We install the second Windows system using the WinNTSetup utility. How to install Windows operating systems using the WinNTSetup program Installing Windows on a different disk partition
Installing a second Windows on a different disk partition from a running first Windows. In order not to languish waiting for the installation media to load while system files are copied from it to the hard drive, installing a second Windows can be simplified using a free program WinNTSetup.
1. About WinNTSetup.
WinNTSetup- a small program designed for a narrow range of tasks: it allows you to install Windows in a simplified mode on other partitions and hard drives of your computer, as well as on virtual VHD drives. As additional features of the program, there is a small selection of tweaks for the installed system and the ability to integrate your drivers. If in the usual case WinNTSetup only saves time on installing a second operating system, then for cases where there is neither a DVD drive nor a USB flash drive, this is also the best solution to the problem.
All that is required to install Windows on another disk partition from a working current system is the downloaded ISO image of the Windows distribution kit and, in fact, the WinNTSetup program itself. WinNTSetup works according to this principle: certain parameters are set in its window, after which the system installation process starts in the background. At the same time, you can continue to work with the computer, as if background tasks were being performed by any other minimized program. Upon completion of the Windows installation process on the second partition of the disk, all that remains to be done in the normal mode, booting from the newly installed Windows is to go through the final stages of the installation process: wait for the drivers to be installed, set the region, keyboard layout and other parameters, create a local profile, or connect Microsoft account. Let's consider all this in more detail.
First of all, of course, you need to make a backup of the current Windows. Not so much for its own sake, but for the sake of the boot sector, where, of course, changes will be made during the installation of the second system on another partition of the disk. The presence of an emergency bootable disk media with a backup program is welcome.
2. Download WinNTSetup.
You can download WinNTSetup from the website. This is a portable program that does not require installation on the system. After launch, you immediately need to agree to download some data.
3. Connecting the ISO image of the Windows distribution.
The installation files of the second Windows WinNTSetup takes either from the installation DVD in the drive, or from the ISO image downloaded from the Internet. The downloaded ISO image must be mounted into a virtual drive. In Windows 8.1 and 10 systems, this is done regularly using the "Connect" option in the context menu on the ISO image.

In Windows 7, to mount ISO images, you must use third-party programs such as Daemon Tools.
4. Installing Windows on another disk partition.
WinNTSetup will launch with an active tab for installing Windows versions starting with Vista. In the first paragraph of the program window, you need to specify the path either to the file install.wim, or to install.esd included in the Windows distribution. Depending on the assembly of Windows, its distribution will contain an "install" file with either one or another extension. We press the button " Choose».

And specify the path to the file, it is located on the installation disk in the folder " sources».

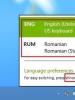
The second item in the WinNTSetup window specifies the disk partition that will serve as the boot sector for the Windows being installed. In Windows 8.1 and 10, a certain partition is specified by default Z. How WinNTSetup Partition Z defines a small technical partition (350-500 MB) of these versions of Windows called "System Reserved" ( System Reserved).

Nothing needs to be changed here.

In Windows 7, this item will default to the disk WITH, since in this version the boot sector is placed on the same partition as the operating system itself. And in this case, we also do not change the presets, leave the disk WITH.

We go down to the next item and using the button " Choose"We indicate the very second partition of the hard disk where we are going to install the second Windows.


If the disk partition selected for the second Windows has not been previously formatted, this can be done without leaving the WinNTSetup window. By pressing the button " F»The regular function of formatting disk partitions will start.

The basic information about the system being installed has been entered, now you can start the installation process. But before pressing the button at the bottom of the window " Installation”, you can delve into the program settings. In the lower block of the window, the path to your drivers is indicated and tweaks are applied to the installed system.


After pressing the button " Installation"Launching the Windows installation process on the second partition of the disk is additionally confirmed by clicking" OK».

After that, the program window can be minimized and go about your business. WinNTSetup will notify you about the completion of the operation with such a notification.

This means that only installed Windows will start at the stage of preparing the operating system for deployment. After rebooting the computer, we will be greeted by the bootloader menu with a choice of operating systems to start. Select, respectively, the newly installed Windows. And we go through the steps of deploying Windows - specifying regional data, keyboard layout, network settings, creating an account, etc.

5. Installing Windows on another hard drive.
The process of installing a second Windows on another hard drive is a little more complicated, since for Windows 8.1 and 10 systems you will have to manually create a separate partition for the bootloader. For Windows 7, it is enough to simply make the partition of another disk on which the system is planned to be installed active. Run the regular disk management utility by pressing the + R keys and enter:
diskmgmt.msc
If the other hard disk is not partitioned, we form partitions on it. On the first section, call the context menu and click " Make section active».

We make sure that the section is active, remember its letter.

In the WinNTSetup window, specify the path to the installation file, as shown in the previous paragraph of the article. And as the bootloader partition and the partition of Windows 7 itself, we specify the prepared active partition. And we start the installation process.

For Windows 8.1 and 10, you need to prepare both the system partition and the bootloader partition - the same technical partition that is not displayed in the system explorer, but in disk space managers is listed as the System Reserved partition. If the first partition of another hard disk is already formed, it must be deleted and a new one created in its place. In the context menu on the unallocated space of the remote partition, select " Create a simple volume».
We carefully check that the first small section is active, and remember the letters of both sections.

In the WinNTSetup window, we indicate the newly prepared sections: in the second paragraph - a small section, in the third - a section of the system itself. And start the installation process Installation).

After WinNTSetup completes its work, you need to restart the computer, enter the BIOS, set the boot priority, respectively, from another hard drive and go through the steps for deploying Windows.
WinNTSetup Portable Multi/Ru can be downloaded
20304Installing a second operating system on a free partition is traditionally performed from portable bootable media - DVD disc or flash drives. But what if there is no flash drive or disk at hand, but there is only a regular bootable one? In this case, WinNTSetup will help out a lot - a small utility for quickly installing a second Windows operating system on a free hard disk partition.
The utility is free, supports all popular versions of Windows, including Windows 10, has a simple Russified interface.
In addition to its intended purpose - installation of the second system, WinNTSetup supports a number of useful optimization settings, such as turning off transparency effects, control UAC, sleep mode and more.

Additionally, it is possible to install drivers, as well as work with answer files.
How to work with WinNTSetup
Suppose that next to Windows 8.1 you need to install Windows 10. Run the utility and in the upper field of the window that opens, specify the path to the file install.wim from the unpacked with the operating system.

It may happen that when you start WinNTSetup it will ask you to download an additional component Windows 8 ADK . We agree and download, because without it it will not start.
Note: If the main system 32 bit, then the second must also be 32 bit, otherwise the utility will give an error.
In the second field, you must specify the partition into which the bootloader will be installed. The section must be active, so go to "Disk Management", right-click on the selected section and select the option from the menu.

Important: after converting the partition to active, it will be possible to restart the computer only after WinNTSetup has performed all the necessary manipulations, otherwise you will not be able to boot anymore.
In the third field, specify the drive where the second operating system will be installed. This may be the same partition on which the bootloader will be installed. To format it, press the F button next to the browse button.

Next, click "Install", in the window that opens Necessarily(!) set the checkboxes "Find and add to the boot menu all versions of Windows" And "Automatically restart PC after installation".

We press OK. Now it only remains to wait until the utility unpacks the Windows image files.

WinNTSetup portable is a program understandable even for a monkey that will create a bootable or installation flash drive to install Windows or boot any operating system via USB interface. The winntsetup process installs windows automatically, after specifying the path to your flash drive and the path to the iso, wim or any other image intended for installing the operating system. The best solution for 2017 is WinNTSetup portable - to create a bootable flash drive, and winntsetup does not need instructions on how to use it, since everything is intuitive. If someone still has difficulties, then ask in the comments, I will be happy to help everyone.
Installing windows via a flash drive and a USB connector is now easy even for a teapot, with the Russian winntsetup 3.8 7 final portable version relevant for 2017. For those who are especially suspicious, there is the winntsetup official website - http://www.msfn.org, where there is reliable information, a link to the original winntsetup and clear instructions on how to use this program.
WinNTSetup download and instructions on how to use WinNTSetup portable torrent
Additional InformationVersion: 3.8.7.3 portable
Interface language: Russian and others
Official site: http://www.msfn.org
File format:.EXE
Treatment: no need
Size: 2.13 Mb
The program works with the following operating systems
winntsetup - install windows XP
winntsetup - windows 7 on 64 bit and on 32 bit
winntsetup - windows 8.1 on 64 bit and on 32 bit
winntsetup - windows Vista 64 bit and 32 bit
winntsetup - windows 10 64 bit and 32 bit
Screenshots of the installed original WinNTSetup portable


winntsetup instruction how to use
The figure describes the main points when creating a bootable USB flash drive 
WinNTSetup is a free program that allows you to quickly create an installation disk or flash drive. This version of WinNTSetup is portable, so it does not require installation on a computer. This utility will allow you to create a special USB installer, with which you can easily install Windows - the operating system on your computer.
Equipment requirements:
USB Drive Requirements:
1. Memory at least 16 GB (preferably 32 GB or more).
2. NTFS file system.
3. USB 2.0 or USB 3.0 interface (the second one is preferable, as it has a much higher read / write speed).
Computer requirements:
1. Processor with a frequency of at least 1 GHz.
2. RAM at least 2 GB.
3. Availability of a USB port with support for USB 2.0 or USB 3.0.
It is worth noting that booting the operating system from a USB drive is possible only if it is connected directly to the computer (booting from a drive connected to a USB hub is not possible).
Some remarks.
1. Due to the fact that the operation of the operating system requires a huge number of read / write operations, we recommend using a removable hard drive or SSD with a USB interface as a removable media for writing Windows 10, since a flash drive that is not suitable for such a number of operations can quickly exit building.
2. Please note that the speed of such an operating system when using USB 2.0 drives will be significantly lower than the speed of the system in normal mode (we recommend using USB 3.0).
3. When preparing the USB drive to write the operating system to it, it will be completely cleared, so pay attention that no valuable information is left on it.
Ways to install Windows 10 on a USB drive.
To solve our goal, we can use programs specially designed for this, such as WinNTSetup or PWBoot. Or do it with standard (built into the operating system) means. For the most inquisitive, we will also describe in detail the installation option using the command line. In all cases, we need an image of the operating system. It must first be unzipped using some archiver, such as WinRar.
1 way. Installing Windows 10 on a USB drive using the WinNTSetup program.
The first time you run WinNTSetup, you will be prompted to download ADK files. We agree by clicking "OK".
In the main window of the program, set the installation parameters. In our case, we need a second tab. Here we first specify the path to the install.wim file, which is located in the folder with the unzipped system image. Then we indicate the disk on which the bootloader will be installed, and below, the disk on which the system will be installed - in both cases we indicate the USB drive (in our example, drive E). And, if OS optimization is not required, click the "Install" button. 
If necessary, you can configure some parameters that optimize the installed operating system by clicking the "Optimize OS" button. 
After clicking the "Install" button, an information window will appear as in the figure below. Without changing anything, click "OK". 
If during the installation process the error "Failed to apply the system image! 0x52" occurs, as in the figure below, 
then you need to check whether you have chosen the correct file system of the USB-drive. The disk must be formatted with NTFS. After formatting to the desired file system, repeat the steps described above.
If there were no errors, then after 1.5 - 2 hours the unpacking of the archive will be completed, and you will be prompted to reboot. We agree and boot from USB.
Now it remains to boot from a USB drive, how to do this is described.
Video of installing Windows 10 using WinNTSetup
2nd method Install Windows 10 on a USB flash drive / hard drive using the command line.
The advantages of this method over others are that no additional software is required, it can be implemented on any version of Windows (including Home and Professional), any drive with sufficient memory is suitable for installation. For installation, we need only a few utilities built into the operating system, which we will work with using the command line interface and, of course, the image of the Windows 10 operating system.
So, start the command line and enter diskpart. The diskpart.exe utility window will open, where we sequentially enter the following commands (run the command by pressing the "Enter" key):
1. list disk- show a list of disks (by the size of the disk, we can determine the number of the USB drive we need);
2. select disk 1– select disk 1 (In your case, this may be a different disk number. Choose the number very carefully so as not to delete anything superfluous);
3. clean– clear partition configuration;
4. create partition primary– creation of the main section;
5. format fs=ntfs quick- formatting the created partition (quick - for quick formatting);
6. active- make the section active;
7. assign letter=Z- assign a letter to the section (you can choose any other letter that is not occupied by other sections);
8. exit- terminate the application. 
To perform the next step, create a Windowstogo folder on drive C and copy the image of the Windows 10 operating system (install.wim file), which is located in the Sources folder, there. 
Now we need to deploy the Windows 10 image on our media. To do this, we will use the dism.exe utility. Run the command prompt again, but now with administrator privileges (right-click on the command prompt icon and select "Run as administrator" from the context menu). 
First, let's find out what images are inside the install.wim file.
You can do this with the command:
dism /get-wiminfo /wimfile:c:\windowstogo\install.wim, where c:\windowstogo\install.wim is the path to the previously copied image. 
Now that we know the image number, we can start unpacking it on our drive. To do this, enter the command:
dism /apply-image /imagefile:c:\windowstogo\install.wim /index:1 /applydir:z:\, where c:\windowstogo\install.wim is the path to the operating system image, /index:1 is the image number, z is the partition letter on the USB drive.
On a medium-sized computer (2 GHz Intel i3 processor, 4 GB RAM), deploying the image to a USB 3.0 flash drive took about two hours. 
It remains only to wait for the end of the deployment procedure. After the reboot, it will take another 15 minutes to prepare for the first launch. 
The next step is to boot from the created media, how to do this is described.
Video of installing Windows 10 on a USB flash drive using the command line.
Method 3 - Windows To Go
Installation in this way is not suitable for everyone due to the fact that this option is available only to users of Windows 10 versions of Enterprise (Corporate) and Education (For educational institutions). The fact is that Windows to go was conceived for large organizations as a way to organize the activities of workplaces with the possibility of non-standard placement. In addition, not every media is suitable for writing an operating system to it using Windows to go, since there are certain requirements for the drives used for this. 
The list of devices certified for Windows to go can be viewed on the MicroSoft technical portal (https://technet.microsoft.com/ru-ru/library/hh831833(v=ws.11).aspx#wtg_hardware). If your equipment does not meet the specified requirements, then try other installation methods.
To start Windows to go, use the built-in "search engine" and enter to go or windows to go there. Choose the one you need from the suggested options and follow the instructions of the wizard. 
The WinNTSetup user just needs to specify the path to the Windows installation files: .wim, .swm or .esd, which can be extracted from the ISO image of the installation disk, select the disk on which the operating system loader will be installed (if possible, the utility will suggest the appropriate one itself), and also disk on which the future system will be installed. The program will unpack and prepare the files of the operating system, and the user will only have to boot into it and go through the initial setup steps, usually offered after installation.
The creators of the program provide the ability to select the desired edition of Windows and the letter for the system drive. Experienced users and system administrators will certainly enjoy the ability to use answer files and automatically integrate the necessary drivers into the system. In addition, WinNTSetup supports working with virtual hard disks and contains all the tools needed to create them.

To save disk space and not to refuse the function of a simple system restore, technology support will help. To simplify the system configuration of an already finished system, the ability to automatically apply popular tweaks, such as disabling arrows from shortcuts or locking the screen, as well as your own set of user registry tweaks, allows you to automatically apply.

WinNTSetup is distributed free of charge and does not require installation. The program interface is completely Russified, for almost every available function there is a text hint that simplifies the development of its capabilities.