Can a laptop share wifi windows 8
We need to create a software WiFi router based on Windows 8 that will receive the Internet in some way and be able to distribute this Internet via WiFi.
What do we need.
- Windows 8.
- Old WiFi adapter. For example, for this article, a USB WiFi adapter was used TP Link TL-WN722NC.
- Internet connection. For this article, an ADSL connection was used through the Rostelecom operator. But it can be any connection - PPPoE, VPN, GSM Dail-Up, LTE RNDIS, Ethernet, WiFi.
Step one
You need to make sure that the WiFi adapter is available, turned on and working. If it's not there, then install it. For example, if you have a laptop and it has a built-in WiFi adapter, it can be turned off in BIOS or with a special hardware button. Without an adapter or with the adapter disabled, you will not be able to distribute WiFi with Windows 8.
step two
You need to check that the Internet connection is working. Make sure your computer or laptop has Internet access. Otherwise, what will you distribute over WiFi?
Step Three
After that, you need to check if the "WLAN AutoConfig Service" and "Internet Connection Sharing (ICS)" services are running. This check is done through "Control Panel - Administrative Tools - Services". By default, these services start automatically, but it may be that some smart guy "optimized" your Windows and disabled these services. It happens - a shkolota reads the Internet and begins to "improve".
Step Four
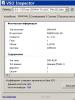
After that, you need to open the Windows console (cmd.exe) with administrator rights. This can be done by opening the Windows 8 start screen, then from it go to the program menu, find "Command Prompt" there, right-click and click "Run as administrator":
Or open Windows 8 Explorer, in it open the "File" menu item and then "Open command prompt - Open as administrator":

Or by opening the WinX menu in Windows 8. There is a special command in this menu:

This menu is opened from the keyboard - Win + X keys.
Step five
In the console, you need to type and execute the command:
netsh wlan set hostednetwork mode=allow ssid=winap key=123456789 keyusage=persistent
Instead of winap And 123456789 you can write a different access point name and a different password for it:

Note. Important!
The password must be at least 8 characters long, this is a requirement for the WPA2 security type that Windows uses when creating an access point.
It is better not to use Cyrillic in the password.
Letter case matters - A And A they are different characters!
Step Six
Now you need to start the access point. Again, in the console, type and execute commands
netsh wlan start hostednetwork

The second command shows the current state of the access point.
step seven
Open the Control Panel, then Network Connections and there you should see something like this:

In this example, "Ethernet Network 2" is the connection to the Internet. And "Local Area Connection 2 winap" is an access point.
Now you need to share (enable Windows ICS) Internet connection. Select this connection, then right click, then "Properties", "Access" tab. Enable ICS and specify the connection to which the Internet will be distributed - on the WiFi connection of the access point ("winAP"):

Step eight
Connect the client to this access point and check the Internet. And in the console you can type and execute the command
netsh wlan show hostednetwork
It will show the number of connected clients:

It can be seen that one client is connected.
How to connect WiFi client on:
- Laptop (or computer) under Windows - WiFi setup in Windows 7.
- Laptop (or PC) under Linux - Laptop (or PC) under Ubuntu.
Access Point Management Windows 8
Stopping an access point with a command netsh wlan stop hostednetwork
Complete destruction of the access point with the command netsh wlan set hostednetwork mode=disallow
If you want the access point to turn on automatically when Windows boots, then the start command must be added to autorun. Talking about the team netsh wlan start hostednetwork. The command can be written in a cmd script, it is necessary to specify "Run as Administrator" in the properties of this script. Then include the script in autorun.
It is necessary that the Internet connection is also established when Windows starts. Otherwise, you will have an access point, but there will be no Internet through it.
Of course, this is a very simple access point. But everything is at hand. No third party programs needed. Only Windows 8. And everything is configured in a couple of minutes.
Someone might say that in this option, there are not many features that an access point should have. This is true. Only this is an option when you need to make a WiFi router very quickly and without problems. And just such an opportunity Windows 8 provides - with a minimum of gestures, what is called "on the knee" to create an access point.
And if your needs are wider and deeper, if you need an access point for every day, or in complex configurations - then you don’t need to use Windows, but buy a decent, or even a good WiFi router. A decent WiFi router now costs less than a thousand rubles. And in such a situation, sculpting a structure based on a computer and Windows is somehow absurd.
Another thing is if an access point is needed once a month, for a day or for a couple of days. Or on a business trip. Or on vacation. This is where Windows comes to the rescue. You can quickly distribute the Internet via laptop WiFi to a tablet, smartphone or other laptops.
But if there is a need to make a permanent access point on the computer, then it is better to do it under Linux. As actually it is implemented in WiFi routers. For example, as in this article - Access point on Ubuntu.
hotspot on windows 8 not working
No need to swear at Microsoft, on Windows - in general, look for the guilty on the side. The problem in such cases Always on your own computer (or laptop). It could be:
- WiFi adapter driver on which you create an access point.
- The WiFi adapter itself.
- You did something wrong.
- Any "left" services or drivers / programs that use the WiFi adapter or USB port (if your adapter is connected via USB).
For example, during the Windows startup process, the WiFi adapter driver may put the adapter into standby mode. And when Windows starts the service hosted network the adapter does not wake up.
With a normal WiFi adapter and if you have not polluted your Windows with crooked programs and drivers, everything will work fine.
In general, always look for the source of the problem on your computer.
WiFi network protection
Ivan Sukhov, 2014 .
If you found this article useful or just liked it, then don't be shy - support the author financially. This is easy to do by throwing money on Yandex Wallet № 410011416229354. Or on the phone +7 918-16-26-331 .
Even a small amount can help writing new articles :)
Is it worth buying special equipment to distribute wifi in the house? Well, to be honest, it is desirable to organize high-quality wireless Internet using a well-built infrastructure. However, a special setup of the laptop and Windows will help solve this issue without any problems. Such an access point can cope with the daily needs of any person. There are several ways to do this: manual and program. Of course, it is better not to install third-party software, as it may contain viruses. But, you might get lucky.
Preliminary preparation
The fact is that today there are a lot of devices that provide the Internet. These are network equipment cables, routers, computers with wifi adapters, 3G and 4G modems. The access point can be implemented on any device that has a wifi wireless data transmission module. The interaction takes place as follows: a laptop (or a desktop computer) receives data via a 3G (4G) cable or adapter, then it distributes them via a wifi channel to any devices. If the apartment is not yours, or you are away, where the network infrastructure is not established, or there is simply no desire to purchase additional equipment, then you can implement a similar method in practice, for example, through Windows.
It is very remarkable that on Windows both the eighth and the seventh generation, the distribution setting for such the necessary wifi is implemented in almost the same way. Let's start with the first obvious steps:
- We connect the cable to the computer to organize the Internet on the laptop. You can also use a 3G modem. You can determine if everything is working by trying to open pages on the network.
- It is important that the laptop has working wifi. Determining this is also very simple, if you used to connect to a wireless network from a laptop, then everything is fine. Typically, drivers are installed by manufacturers. If they are not there, then the Driver Genius program helps, which itself finds the missing elements on the network and puts them on Windows. Next is the wifi setup.
Manual way
So, setting up a laptop can be done using standard means of the computer itself. Do not be afraid that you will have to work with the command line, in fact, there is nothing complicated in it. To launch a command prompt on your computer, press the Win and X keys, then select Command Prompt. In this same command line, you must enter the command: netsh wlan set hostednetwork mode=allow ssid=f1comp key=12345678. In this code, there are two points that the user can choose at will:
- f1comp is the network name that came to mind first. It can be done by anyone.
- 12345678 is an arbitrary password, of course, it can be made even more difficult.
 The second step is to press Enter. The command line should then report that everything was successful. Then you need to enter the following line: netsh wlan start hostednetwork - this command starts the access point. Press the Enter key again, after which the command line writes:

It happens that the setup at this stage is interrupted by an error. In this case, you should try to enter two additional lines: netsh wlan set hostednetwork mode=disallow and also netsh wlan set hostednetwork mode=allow. Then you need to go to the Device Manager (just open the Start menu and type this name there). There will be a list in which you should select Network adapters, right-click directly above Virtual Hosted Network Adapter and select Enable. Next, re-enter the two lines that were described above: netsh wlan set hostednetwork mode=allow ssid=f1comp key=12345678 and netsh wlan start hostednetwork.
Opening access
Not only must the access point be running, but other devices must also be allowed to use the computer's wireless network. You need to right-click on the Network and Sharing Center icon.

A window will appear, on the left side of which you must select Change adapter settings. A list of connections will appear in which you should select the method by which the Internet is connected. If it is a wired cable, then click on Ethernet. Select Properties from the context menu and go to the tab with the logical name Access.
On this tab, check the box next to Allow other network users to use this computer's Internet connection. At the bottom of the tab there will be a list in which you need to select a network and click the OK button.

That's basically it, the access point has begun its work. Now you can safely connect to wifi, which you managed to distribute from your laptop.

It also happens that it was possible to connect, but there is no Internet. In this case, you should try to close antiviruses and antivirus programs.
If the laptop's operating system had to be rebooted or turned off, the access point will also turn off. It needs to be launched again. To do this, start the command line and type in it: netsh wlan start hostednetwork.
Automatic way
Naturally, there is a program for a laptop through which the distribution of wifi is organized. It's called MyPublicWifi. This is a simple and free program for Windows. As soon as this program is installed on the laptop, you need to reboot. If errors occur, you should run MyPublicWifi as an administrator.

Let's do a few simple things:
- Select Automatic HotSpot configuration.
- Specify the name of the network we are going to create in the Network Name (SSID) field.
- Select a password for connection in the Network Key field.
- Check the box next to Enable Internet Sharing and select the connection.
- Click Set up and Start Hotspot.

Now the distribution of wifi is organized, you can safely connect. If the connection worked, but the pages do not open, then you need to allow access, as already mentioned above. Any program that administers the network can block the connection, so it is important to control the actions of antiviruses and other applications. MyPublicWifi on the Clients tab shows through Windows all devices that are connected to the created wifi network.

On the Management tab, it is possible to make additional settings for the network. If you check the box next to Enable Firewall, then connected devices will not be able to use Torrents and similar programs.
There is one extremely useful setting that helps organize the network automatically. If you go to the settings and check the box next to MyPublicWifi Will be launched on every system start, then the distribution of wifi will start automatically every time the computer starts.

In theory, no problems should arise in Windows, and the access point will function properly.
(Visited 22 888 times, 1 visits today)
There is an urgent need for high-quality Internet connection. Cellular operators do not always guarantee high speed and quality, which cannot be said about Wi-Fi. If you consider that using a home network will cost less, then the presence of a router becomes almost mandatory.
The laptop can both receive a Wi-Fi signal and distribute it to other devices
But if for some reason there is no router or its purchase is impractical, its functions can be easily replaced using a laptop with Windows 8/8.1. How to turn it into an access point, read our review.
How to share Wi-Fi with Windows functionality
For this purpose, a laptop with Wi-Fi and Windows 8 (8.1) installed is suitable. Absolutely all current models are equipped with it. It is possible to deploy an access point using the OS in a matter of minutes.
- Turn on the Wi-Fi adapter on the laptop and double-check for drivers for it. It is enabled by a combination of Fn and F1-F12 (depending on the manufacturer). You can also click on the network icon in the system tray and activate the "Wireless Networks" slider. In the Device Manager subsection "Network adapters", the name of the communication module should be presented. If there is an exclamation mark next to the name, then the module is not active. Right click Enable. If an exclamation mark with a yellow triangle is visible near the name, you need to install the driver. Download it from the laptop manufacturer's website.
- Connect your laptop to the Internet using a network cable, 3G/4G or ADSL modem. The Windows 8.1 system tray should show an active connection.
- Make sure "WLAN AutoConfig Service" and "Internet Connection Sharing (ICS)" are running. Press Win+X - Control Panel - Administrative Tools - Services. Make sure autostart is selected in the settings.

- Enter the command line in one of the following ways:
- Win + X - Command line (administrator).
- Win + R - cmd.
- Enter the Windows Start Screen, go to the application menu, find "Command Prompt", right-click, activate "Run as administrator".
- Make sure the wireless module is ready to distribute the Internet as a Wi-Fi access point. On the command line, type netsh wlan show drivers. Find "Hosted Network Support". If there is “Yes” next to the entry, then go to the next step.
- Add a team netsh wlan set hostednetwork mode=allow ssid=Your_network key=123456789 keyusage=persistent to implement a virtual hotspot.

- SSID is the name of your connection, you can name it whatever you want. The main thing is that there are no Russian characters in the name.
- Key - network password, you can also change it to your own. Moreover, it must contain at least eight characters, without Russian characters.
- Activate the formed network. Dial a team netshwlanstarthosted network. The access point has started, the distribution has begun. You can check its availability, for example, on a tablet or phone. Your name will appear among the available networks.
- Allow network members to receive the Internet:
- In the Network and Sharing Center (right-click on the Internet symbol in the system tray), go to "Change adapter settings".
- Find "Local Area Connection* 1" (number may vary).
- Right-click on the connection you used to share Wi-Fi, then go to "Properties" and switch to the "Access" tab.
- Check "Allow other users to use this computer's Internet connection", check the new Wi-Fi connection in the list of home networks.
Now the equipment will be able to receive the Internet from the newly formed access point. To control the operation of the virtual router, enter in the command line of the laptop netshwlanshowhosted network, so you can check the number of connected devices. The connection is terminated with the command netshwlanstophosted network. The only drawback is the need to write start and stop commands when connected. Therefore, we recommend saving them, for example, in a text file. Now a laptop under Windows 8.1 will easily become a source of Internet without wires.
The use of third-party programs
If the constant use of the command line does not suit you or you want to start everything with two mouse clicks, special programs will help that make it easier to distribute the Internet from a laptop running Windows 8.1.
Connectify Hotspot. A popular program that distributes Wi-Fi without unnecessary operations. It is enough to launch the program, define a connection for sharing, set a password and run it. Often the free version is quite enough, although one of its tangible limitations may be the lack of the function of distributing the Internet from a 3G / 4G modem, which can cause inconvenience during business trips. The inability to change the connection name will not be considered a critical drawback.

MyPublic Wifi. A free program for sharing Wi-Fi between devices, it can function as an access point or repeater. Supports all the latest versions of Windows, including 8.1. Run it, come up with a network name, password, select a network for distribution and click "Start". A few movements - and the access point in the laptop is running.
Conclusion
We examined all the methods by which you can distribute the Internet through the Wi-Fi adapter of a laptop running Windows 8/8.1. It's really not difficult at all and takes a few minutes.
Write in the comments, did you manage to follow all the recommendations? Has the access point started? We'll be glad to read you.
Wi-Fi setup in 4 steps
1. To create Wi-Fi access point, right-click on the lower left corner of the "Start" and run the command prompt as administrator. Next, copy the following to the command line:
netsh wlan set hostednetwork mode=allow ssid= Network_name key= Password
* "Network_name" and "Password" - Change to network name And password.
2. To activate the network enter:
3. Information about connection:
netsh wlan show hostednetwork
4. In " Network and Sharing Center” the new network connection we created will appear. We go to " Changing the parameter setting"And open the properties of the network adapter connected to the Internet and on the tab" Access"Tick the box" Allow others to connect to this computer's Internet” and select our new network connection in the drop-down list below. Click OK. Now you can connect to our network and the Internet. Tested on Windows 8 Pro and Windows 7.
To quickly start a Wi-Fi network you can create *. bat file and run it as an administrator, which will speed up the process of starting the network. To do this, we need to create a text document with two lines:
netsh wlan set hostednetwork mode=allow ssid=NetworkName key=Password
netsh wlan start hostednetwork
* "Network_name" and "Password" - Change to the network name and password.
Add-on for Windows 8.1
If Virtual Adapter switched off. We turn it on.
On a command prompt run with administrator rights:
netsh wlan set hostednetwork mode=disallow
netsh wlan set hostednetwork mode=allow

To display Virtual adapter In Device Manager, check Show hidden devices.

In the Device Manager from the section Network adapters in the properties virtual adapter uncheck "Allow shutdown ..."

Example
Since the subnet mask of my home Internet is different from the default subnet mask, in the properties of TCP / IP 4 we write:
IP address: 192.168.137.1 and subnet mask: 255.255.224.0


Thanks to modern wireless technologies, private home groups, which are created to combine several PCs, smartphones, tablets and other equipment, are very widespread. This allows you to exchange data, as well as control household appliances and office equipment remotely without the use of cables. As a rule, wireless routers are used to organize such networks. But what if the router is not at hand? How to create a WiFi hotspot on a Windows 8 laptop?
It's quite real. What's more, it's easy to do so. You just need to know a few rules. In this article, we will look at how to create a virtual hotspot on a laptop running Windows 8.
How to create a private group using a laptop
I would like to note right away that a private virtual network can be organized using any laptop that has a WiFi adapter. Moreover, if the laptop is connected to the Internet (using a cable or any other connection), then the members of the virtual group will be able to access it. You will learn how to do this by reading this post.
How to easily create a hotspot and distribute WiFi from a Windows 8 laptop: Video
So, in fact, there are several ways to create a virtual network:
- Using the built-in tools of Windows 8.
- With the help of programs from third-party developers.
Let's see how both methods work.
How to create an access point on a laptop using the built-in tools of Windows 8
First you need to run a command prompt with administrator rights. To do this, move the mouse cursor to the upper right corner. After that, a pop-up menu will open in which you need to find and start the search. Type "Command Prompt" in the search bar, right-click on the result and select "Run as administrator".
In the window that appears, you just need to type the command to create a virtual access point. After that, the system will detect a new device, and a new LAN connection will appear in Connections 3.
To manage a virtual network, there is a set of commands that must also be written on the command line:
- Create a virtual hotspot - netsh wlan set hostednetwork mode=allow ssid=My_virtual_WiFi key=12345678 keyUsage=persistent. Here SSID is the name of the network, it can be anything (only in Latin letters), and Key is the group key that will be required to connect.
- Starting the created network - netsh wlan start hostednetwork.
- Stopping the network - netsh wlan stop hostednetwork.
Create a WiFi hotspot on a Windows 8 laptop using the command line: Video
If everything is done correctly, then your WiFi hotspot on a Windows 8 laptop has been created. It remains to provide general access for network users. In addition, if the laptop is connected to the Internet, then it can also be distributed via WiFi.
This is done in the following way. Launch the Network and Sharing Center. This is done in the same way as we started the command line. In the window that appears, go to the "Change advanced sharing settings" item and turn on network discovery, as well as other services. Here you need to turn off password-protected sharing. We save the settings and return to the network control center.
Now we are interested in the "Change adapter settings" menu. We start the service and in the window that appears, look for a connection that provides the computer with Internet access - it can be a local connection, or a USB modem, as well as a wireless network connection. Click on the connection with the right mouse button and go to the properties of the connection.
Here we need the “Access” tab, in which we should check the boxes, and in the “homegroup connection” line, select the created network (LAN connection 3). Click OK and close all windows. That's it, your Windows 8 laptop WiFi hotspot is now set up and ready to use.
Organizing a home network using third-party programs
Creating a WiFi hotspot on a Windows 8 laptop using a special program is the easiest way that does not require any knowledge from the user, the only thing you need to know is which program to install. There are a lot of such applications in the vastness of the virtual world. Moreover, you can download them absolutely free.
Despite this diversity, they all work on the same principle, so they have almost the same set of settings. It all comes down to a few points:
- The name of the access point to be created.
- Security key and encryption type.
- Selecting an Internet connection for distribution.
Of course, in addition to this, there may be additional settings, however, this is the basis of all programs for creating virtual access points. As a rule, there is an instruction for the program, so there should be no difficulties.
How to Share WiFi with Conectify Hotspot: Video
Now you know that a laptop as a WiFi hotspot in Windows 8 is possible, and quite doable. Which method to use is up to you. One has only to clarify that the first method allows you to receive and distribute the Internet via WiFi, which cannot be done about the second option. In addition, it is worth understanding that built-in tools always work more stable than third-party programs.
I have over 10 years of experience in the IT field. I am engaged in the design and configuration of commissioning. He also has extensive experience in building networks, system administration and working with ACS and video surveillance systems.
I work as a specialist in the company "Techno-Master".