How to make the background of an image transparent in paint. Master class "how to remove white background from images". An easy way to change the background
Dear friends, I am glad to welcome you to the SITE. Today, I will introduce you to a big lesson - HOW TO MAKE A PICTURE WITH INVISIBLE BACKGROUND. And although the lesson is not big and simple, but, nevertheless, important. Very often there is a need to insert a picture into a picture, and then these skills will be indispensable.
Opening the program Paintand insert the photo from which you want to remove the background. And one more small digression, I use the program Paint. net, not justPaint. Therefore, there may not be big differences on the screenshots. The programs are almost the same, but PAINT. nethas more features and conveniences like the newer version. If you wish, you can download it from the Internet, the program is free. How to do this, I wrote in the article - HOW TO DOWNLOAD THE PROGRAM CORRECTLY AND QUICKLY. All programs are downloaded according to the same principle.
And so, they openedPaintand put in a picture. I should note that in the simplest first programs Paintthis feature does not exist. Therefore, we immediately turn to the program Paint. NET, on its basis in the future we will get acquainted with the basics of Photoshop.

Now we find a tool called "Magic Wand" (1) Click on it and then on the area that needs to be removed. I have a white background. The area to be removed is colored blue. Now click - Delete(Erase) on the keyboard and the background is gone. In the program, the invisible background will be in the form of squares.

Now we need to save the image. How to do this, I wrote many times. Who forgot, you can read in the article - SIGN A PHOTO FOR THE MOST-MOST . The only thing that will need to be done when saving is to change the image format. Non-transparent pictures, usually in the format JPEG, but we need transparent, for example PNG, it's universal. Make it a rule to put this format on all your work - you can't go wrong.
How to change the format? After the program suggested changing the name, before saving, just below, you will see the format. Click on the arrow will open many views, find the one you need and click. Save everything. The program will offer you further several operations, agree with everyone. This is the union of layers and so on.
As a result, we got a picture that can be inserted on any background. Let's assume it's like this.
In order not to understand the huge number of functions and buttons that are useless for ordinary users that the interface of Adobe Photoshop and similar programs offers, many people use the standard Paint for standard image editing, which is originally installed in any Windows operating system. But in fact, even this seemingly simple utility has a fairly large number of features, one of which is the ability to create a transparent background for a specific image. In this article, we will talk about how to make a transparent background in Paint.
Why is this needed?
It should be noted right away that in this case we are not talking about the background of photos, since it is impossible to make a transparent background for a picture as such. But at the same time, it remains possible to remove the background of photos when pasting them into other images, since it can interfere with their merging, and this is quite simple to do:
The "Select All" button also has its own hotkeys assigned to the "Ctrl + A" combination.
Now you can place the pasted image in the place you want and remove the selection. Since you managed to make the background of the image transparent before Paint, it will not overlap other images on the workspace, which is quite convenient if you want to combine several images with each other.
How to insert?
You can paste an image into another using Paint as follows:
- Open the image that will serve as the basis of your image and to which you are going to attach another.
- Click on the arrow below the "Insert" button.
- Select the "Insert from" function, and then select the image for which you made a transparent background.

Since you can remove the background in Paint for several images, in this way you can combine a large number of files with each other, and they will fit into each other as organically as possible.
Software: Paint.NET program.
The audience: teachers, class teachers, students.
The purpose of the master class: Introduction to Paint.NET.
When inserting images from the Internet, a white background often appears, which distracts the attention of students and interferes with better assimilation of the material. Look at the snowman on the slide with a colored background:
Sometimes when setting a transparent color in a presentation, it turns out that the white color is poorly removed or holes appear in the image.

How to make the picture look more attractive and visual?
The white background can be easily removed using the Paint.NET program. Paint.NET is a free raster image and photo editor for Windows, developed on the .NET Framework. Paint.NET is an excellent replacement for the graphics editor that comes with the standard programs of Windows operating systems.
Step 1. Download Paint.NET. The site from which you can download this program: http://paintnet.ru/download/.
Step 2 Install the program on your computer following the prompts.
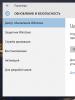
Step 3 Launch Paint.NET. After starting the program window looks like this:

Step 3 We open the image we need through File - Open.

In the window that appears, select the desired picture on your computer.


Step 4 Remove the white background.
BUT) Select the Magic Wand tool from the toolbar.

B) With this magic wand, click on the white background that you want to remove. The picture takes the form (the background color has changed):

AT) Press a key on the keyboard Delete, the image takes the form (squares appear):

G) We can see that the white background has not been removed everywhere (see the picture above). Therefore, we repeat the operation: Magic wand - click on white background - Delete:

Step 5 Saving an image.
BUT) Select "Save As..." from the "File" menu:

B) In the window that appears, select FormatPNG(supports transparency, maximum quality), click on the button Save:


G) OK- Ready. Compare:

Good luck!
Those who buy a computer are initially introduced to the applications that are part of the Microsoft Windows operating system. For starters, many people use the popular application that comes with the Windows XP software package - Paint, the very program that allows you to edit any image with simple tools.
So, this thread will talk about how to make background in paint. By default, it is white in this simple editor.

It can only be changed with a special tool - fill, which will help replace the color. First, you need to select a fill tool, specify your preferred color and point to the tool, on a white background, filling it with the color that you have chosen. In this case, you will get the fill the way you want.

Many are interested in using Paint how to make a transparent background? Unfortunately, in this legacy application, it is not possible to create it this way. Therefore, in this case, you need to use an improved version of this program, which can be downloaded from the Internet - Paint.Net. if you have an operating system of the Windows 7 family, then you do not need to download this application, since it is included. So, let's run Paint.Net and see the modified program interface, which, unlike the previous version, has changed a lot.

In order to make a transparent background in this graphical editor, you need to select the entire workspace with a special selection tool, or you can use the Ctrl + A key combination, which will select the entire workspace. After selection, you just need to press the Del button, which deletes the selected objects. By deleting the selected area, you will find various squares alternating colors on the image. This indicates that your workspace has become colorless.

Now you can work on the transparent layer, creating various drawings and inscriptions. But in order for the transparent background to be like this on websites, you need to save it accordingly, without losing information about the changed pixels.
In this case, when saving a picture, you need to choose a special format instead of JPG - PNG, which can save all information about colors. Thus, by saving the image in PNG format, your transparent layer will remain for using the image as a banner on Internet sites.
Most often, a transparent background is required to superimpose one part of the image on another or on the illustration itself. A colorless background is actively used in the design of websites. Many photos in online stores also require a white color behind the main image, which can only be achieved with a transparent one, since the camera is not able to create a pure white background of 255 255 255 RGB color.
Using the Magic Wand
The easiest way to make a transparent background in Photoshop CS6 and newer versions is to use the " Magic wand" or " magic wand". The following is a step by step guide:
Eraser
Tool " magic eraser» removes close colors, moreover, it automatically converts the background layer into a normal one. The following is a step-by-step instruction for creating a transparent background for an image:

- Then you can use an ordinary eraser clean up leftovers background and finish editing, which will allow you to make the picture on a transparent background.
Background replacement
This function allows you to replace the background or even make it transparent. Detailed instructions for its use:

How to Save an Image Without a Background in Photoshop
Saving a picture without a background will not work in the usual JPEG format; after saving the illustration, the background will be created automatically. To save the desired illustration with a transparent background, you need to use formatPNG. To use it, you need to follow the path: file — save as- type when saving, specify PNG.