How to password protect a file in excel. How to easily put a password on an excel file to protect your document? How to put a password on an excel file
You can put a password on an Excel spreadsheet, thereby preventing access for other users. This can come in handy at home or at work. But in this way, it is impossible to seriously protect the table. Because Excel uses a very weak form of encryption, it is therefore very easy to access the file. Let's try to understand in more detail.
When it is necessary to block access to an Excel file, at home or at work, from other employees, it is enough to put a password on it. The password is set quite simply, right in the Excel file. But, as mentioned above, a protected Excel file is very easy to access. A few minutes is usually enough to hack an Excel file.
However, later versions of Excel have more sophisticated encryption methods. Plus, a complex and long password. Together, this will better protect the table. The older the version of Excel, the easier it is to crack the password. Therefore, you must use a version not lower than Excel 2010, better - 2013 and beyond.
Also with the password, the more complex it is, the better. ? - in this topic, we discussed in detail what you need to rely on when creating a complex and secure password. Another topic that may come in handy when creating protection -? Rely on the tips given in the articles on the links above and you will really good password, and in a place with that and protection.
Put a password on an excel file
And so, let's get down to business. You can set a password for an Excel file in the Microsoft Excel program itself.
There are two ways to protect a file: the first is to put a password on the entire workbook (the entire Excel file), the second is to protect a specific sheet (tab).
Protect a sheet in Excel with a password

All the password for the Excel sheet is set, now when you open this sheet, Excel will ask for a password.
Protect an entire workbook in Excel with a password
Now let's set a password for the entire Excel file.

The entire Excel workbook is now password protected.
The next time you open a protected Excel file, you will be prompted for a password, without which you cannot edit anything and even see the contents of the table.

I never tire of repeating that you need to use strong passwords. Even in this case, if you want to get a protected Excel file, you need not just 12345678, qwerty123, date of birth or the name of your favorite dog, but something more “hard”, like: f0P!LgkTr& - don't try to decrypt, it's just a set of characters: )
And of course, I repeat once again: it is impossible to reliably protect information in an Excel file. But, at least the use of more new version Microsoft Excel and good, strong password help from accidental hacking, something like that.
In the following articles, we will look at how you can access a protected Excel file and you will see for yourself that it is not enough just to put a password in Microsoft Excel to save confidential information.
Most users have information that they would not like to share with others. Moreover, they try to hide it for everyone to read. possible ways. In this article, we will look at how to put a password on an Excel file. In fact, there is nothing complicated here. There are several ways to do this, and we will analyze each of them.
In the modern Excel editor (2007, 2010, 2013, 2016) you can set a security key for both opening a file and editing it. That is, in one case, an outsider will not be able to do anything (even see the contents), and in the other, only reading information will be available to him.
Document lock
For this purpose, you need to perform the following steps.
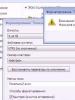
- Open a document. Click on the "File" menu item.
- Then go to the "Save As" section.
- Next, click on the "Browse" icon.
- In the window that appears, follow these steps:
- Select the desired directory to save the document.
- Specify the desired file name.
- Click on the "Tools" menu.
- Then click on "General Settings".
- Immediately after that, a small window will appear in which you can specify the key for both opening and modifying the file:
- Enter something in the first field and click OK.
- After that, you will be asked to confirm the previously specified text. At the same time, they will warn you that there is no way by which you can find out the forgotten key, so it is recommended that you make a list of your frequently used combinations and documents that they correspond to.
- Click "OK" to confirm.
- In order to save the document, you need to click on the corresponding button.
- Close this file.
- Try to open it again. You will be asked to enter the password you provided earlier.
- To continue working with the document, click on "OK".
- Only after these steps this Excel file will become available for work.
Using this method, you completely protect your file from third parties. But there are cases when it is necessary to show the content, but at the same time prohibit editing.
To do this, do the following.
- We repeat the steps described above, but this time we enter the password in the second field. To continue, click on the "OK" button.
- Confirm the security key and click on "OK".
- To save, click on the appropriate button.
- We close the document.
- Reopen it. As a result, you will see the following window.
- If an outsider (or you, but at the same time forgot the code word) does not know the key, then he will have to open the file read-only. To do this, click on the appropriate button.
- After opening the document, you will see that it says "Read Only" in the title. This makes it easy to make changes.
- Now press the keyboard shortcut Ctrl + S (save document). As a result, you will see the following error message.
This means that you can edit the document, but you won't be able to save it with the same name.
Sheet lock
Sometimes there are cases when you need to ban something specific. For example, editing cells, running vba macros, or something else, but keeping all other functions. In this case, protecting a specific sheet, and not the entire document as a whole, will help.
To do this, follow these steps.
- Click the Review tab. Click the "Protect Sheet" button.
- Immediately after that, a window will appear in which you will need to specify (uncheck) what exactly you want to prohibit. By default, only cell selection is allowed, but this can be disabled if desired.
- In addition, you can allow:
- cell formatting;
- column formatting;
- string formatting;
- insert columns;
- row insertion;
- inserting hyperlinks;
- removing columns;
- deleting rows;
- sorting;
- using an autofilter;
- use a pivot table and a pivot chart;
- changing objects;
- changing scripts.
- To save, click on the "OK" button.
- The result will be visible without re-closing and opening the document. Almost all tools will be unavailable. This happens on every tab.
Document Encryption
The above protection is not entirely effective. If desired, a knowledgeable person can bypass it without much effort. It is much more efficient to use file encryption.
Moreover, if you open the official help from Microsoft, you will see the following warning.
To encrypt an Excel file, follow these steps:
- Click on the "File" menu item.
Very often they ask how to set a password for a Microsoft Excel 2007/2010 document so that the document is available to other users in read-only mode. Today I will explain how to set protection for changing an Excel file.
This information is intended primarily for beginners, therefore it is replete with a large number of screenshots and detailed descriptions of actions that may seem to the average user to be completely self-explanatory. Please be understanding.
1. And so, we have an open xlsx document with the name Book 1. Go to tab File as shown in Figure 1.
Picture 1.
2. Here we select the item Save as circled in red.  Figure 2.
3. A dialog box for saving the document appears. Click the button at the bottom of the window Service marked with a red marker in Figure 3.  Figure 3
4. After that, a pop-up menu will appear. It is necessary to select the item Common parameters. Figure 4
5. We see the general options window, where you can set a password for both opening the file and changing it. In our case, it is required to set a password only for changing, therefore, in the field Password to change enter the password.  Figure 5
6. Next, press the button OK. Figure 6
7. In the password confirmation request window, enter our password again, then press the button OK. Figure 7
8. The system returns us to the dialog box for saving the file, where we press the button Save circled in the figure below.  Figure 8
9. And so, we have an xlsx-document, which is protected by a password to change. Let's try to open it.  Figure 9
10. When you try to open a file, you will be asked for a password for full access. In addition, as we see in Figure 10, we can open it in read mode.  Figure 10.
11. In the title of the Microsoft Excel window, you will see that the document is open in restricted mode.  Figure 11.
Did you know that the Microsoft Excel spreadsheet editor allows you to set a password to change both the whole book and a separate sheet? This is very convenient if you need to protect content from users, prevent them from making changes to the table, or block access to it altogether. This is especially true in some companies, where a single file dump is organized on the server, which is available to everyone and where all users dump documents. By password protecting the entire XLS or XLSX file from unauthorized access. At the same time, for those who really need access, you can issue a password on an individual basis.
Let's take a closer look at how to password protect data in Excel.
Setting a password on an Excel sheet
In the lower part of the window we find the list of sheets and click on the desired right click mouse to display a menu where you need to select the "Protect Sheet" item:
A separate window "Sheet protection" will appear, in which you need to specify a password, as well as set the rights that will be available to users using the checkboxes:
After you enter the password, another window will appear in which you need to enter it again to confirm:
Now, when trying to change the contents of a protected sheet, the user will receive the following message:
And if he tries to remove the protection of the sheet, then Excel will require him to enter a password:
Note: You can also call the Sheet Protection window through the main menu in the Review section. See the video for more details:
How to put a password on an Excel workbook
Now let's look at how password protection is set in Excel for a workbook. In the main window of the program and call the "File" menu. There will be such a menu in which you need to open the "Details" section:
The first item is "Protection of the book." Click on it and see the following menu:
Select "Encrypt with password". Excel will ask you to enter a password:
Enter and click OK. After that, you will see a message that a password is required to open this book.
Password for excel file
This method of data protection implies that you want to set a password for the entire XLS or XLSX file so that an outsider cannot open it at all, and if you try to do this, you would be prompted to enter a security key:
After you click the "OK" button, a password confirmation window will pop up twice - first to open an XLS or XLSX file, and then to change it.
After that, you can be sure that you have protected your data well.
When working with documents, tables, sometimes it becomes necessary to establish file protection so that extra eyes do not have the opportunity to familiarize themselves with the contents. The need to set a password for a file may arise even if you do not store any confidential information there, you just do not want anyone to open or change the contents of the file without your permission. In this article, we will take a closer look at how to remove or set a password on an Excel file, and also touch on some other issues related to this topic. Let's figure it out. Go!
Passwords help protect the contents of your files
There are two ways to set a password in Excel. The process itself is nothing complicated. After you have opened the program itself, go to the "File" tab, select the "Details" item from the list. In the menu that opens, click "Protect the book" and select "Encrypt with a password" in the pop-up list. After that, all that is needed is to enter the key itself. You can put a code that will be requested when opening a file. If you are using old version Microsoft Excel, for example, 2003, then you will need to use other tabs: first go to "Tools", then select the "Options" section and in the window that appears, go to the "Security" tab. Further, everything is done in a similar way.

Now let's look at the second approach. It is rather even faster and easier than the first one. When you save the document (“Save As”), click on the “Tools” button and select “General Options” from the list that appears. Then enter your password and confirm it by typing the code again. The advantage of this method is that it is not only faster, but also makes it possible to set a password to change the . That is, if you want the document to be viewable, but no one could make changes to its content, use this function.

To remove the password protection of a Microsoft Excel document, follow the same steps as to set it, only delete the characters from the key entry field.
In the event that the password has been lost and the data contained in the document is very important, you can recover the password. Recovery approaches differ depending on the type of protection set when creating a file. Allocate: simple, complex with a secret and impeccably complex. There is only one solution to the problem - to hack. This is not very difficult to do, everything will depend only on the power of your computer and the type of protection. We will discuss each case in more detail below.
To recover a password with weak protection, you can use special programs designed specifically for this purpose. All of them perform their functions equally well, so it is hardly possible to single out one of them.
If you need to open a securely protected document with a secret, then it is most realistic to do this for the 1997–2003 version of the Excel document. Why exactly? Yes, because with this protection option, the file data is encrypted, the password itself does not play a very big role, so you need to look for the encryption key. In older versions of the program, a relatively small key is used, which greatly simplifies the task of opening a document. Unfortunately, the only way to solve the problem is a banal enumeration of keys. To do this, you will have to use a special program called "Accent Office Password Recovery". After opening it, find and activate the "Search for the key" item. In a couple of minutes you will be able to access the closed file.

In the case of impeccably reliable protection, the approach is the same. The only difference is that the level and complexity of encryption is much higher here, therefore, you will have to use powerful computer and be patient. There are utilities that allow you to connect your PC's video card to the enumeration process in order to increase the speed of key enumeration.
In general, summing up all of the above, we can conclude that it is not difficult to set a password for an Excel file, you just need not to lose it so as not to run into problems recovering this very password. Write in the comments if this article helped you and ask all your questions on the topic discussed.