How to create an exe file. How to make an exe file
We'll consider creation.exe using the py2exe module library. This requires Python 3.4 and below.
If you have a higher version of Python installed, try using (below)
In this example, we will look at creating an .exe with an example Python3.4.
First of all, you need to create a virtual environment for Python3.four. In this example, we will name myenv, you can choose any other name, but do not forget to make the appropriate changes.
Type the following commands in the terminal:
>py -3.4 -m venv myenv > myenv\Scripts\activate.bat
AT command line prefix will appear myenv, which means that the virtual environment named myenv is loaded. All teams Python will now use the new virtual environment.
Now let's install py2exe(https://pypi.python.org/pypi/py2exe~~HEAD=dobj) in our virtual environment:
>pip install py2exeAnd finally, to create a single EXE file, in our virtual environment we execute the command:
>python -m py2exe.build_exe hello.py -c --bundle-files 0
(replace hello.py to the name of your script. If the script is located in another folder, then you need to use the full path to your script, for example, C:\Projects\Python\ hello.py). This will create a DIST folder which contains the executable. For quick access to it, type in the terminal:
> explorer dist
You will see the path to the folder where the EXE file is located.
Note: When executed, a window will open and disappear as quickly as it appeared.
This is because the operating system automatically closes the terminal where the console program is finished.
To change this situation, you can add the line
at the end of the file Python. The interpreter will wait for user input, and the window will remain open until the user presses the enter key.
You can study the usage in detail py2exe in the documentation on the module page: https://pypi.python.org/pypi/py2exe
Exiting the virtual environment is done with the command
>deactivate
Method 2
Through command Windows string install pyinstaller:
>pip install pyinstaller
On the command line, go to the folder where the file is located
CD c:\...
Then at the command line we type the command
Pyinstaller --onefile example.py
Instead of example.py use the name of the file from which you want to create an exe file.
In a couple of minutes everything is ready! Most likely, the exe file will be located in the created subfolder dist
Content:
In this article, you will learn how to create a simple EXE file on a Windows computer, as well as how to create an exe container that can be used to run an executable file on another computer. EXE files are used to install programs or add files to a Windows computer. To create an EXE file, you need to use the IExpress system utility.
Steps
Part 1 How to create an EXE file
- 1 Open the Start menu.
- 2 In the Start menu search bar, type notepad. So you will find the Notepad program.
- 3 Click the Notepad icon. It looks like a blue notepad and sits at the top of the start menu.
- 4
Enter the program code for the file. Enter the code line by line, or copy and paste it into Notepad (if you already have the code ready).
- If you don't know how, ask someone else to do it.
- Also, the program codes of the simplest EXE files can be found on the Internet.
- 5 Click File. This menu is located in the upper left corner of the Notepad window. A dropdown menu will open.
- 6 Click Save As. This option is in the "File" drop-down menu.
- 7
Open the "File Type" drop-down menu. You will find it at the bottom of the window.
- The current "File Type" menu option should be " Text Documents(*.txt)".
- 8 Click All Files. This option is in the drop down menu.
- 9
Enter a name for the EXE file. In the "File name" field, enter a name, and then enter the extension .exe . This will save the file as an EXE file.
- For example, if the file will be called "bananas" (bananas), enter bananas.exe .
- 10 Select the folder where the EXE file will be stored. To do this, click on the corresponding folder in the left part of the window.
- 11 Click Save. This button is located in the lower right corner of the screen. This will save the EXE file in the selected folder.
Part 2 How to create an installation EXE file
- 1 Open the Start menu. To do this, click on the Windows logo in the lower left corner of the screen.
- 2
In the start menu search bar, type iexpress . This is how you find this utility.
- Enter iexpress in full.
- 3 Click the iexpress utility icon. It looks like a gray cabinet and is at the top of the start menu.
- 4 Check the "Create new Self Extraction Directive file" option. It is in the middle of the page. This option should be checked by default; otherwise, select it.
- 5 Click Next. This button is located in the lower right corner of the window.
- 6 Check the "Extract files only" option. It is in the middle of the page.
- 7 Click Next.
- 8 Enter a name for your EXE file. Do this in the text box in the middle of the window, and then click Next.
- 9
Think of a window with a request. If you want the user to confirm that they want to run the EXE file, check the "Prompt user with" option and enter the confirmation prompt text. Otherwise, click Next.
- When the user runs the EXE file, a window will open with the text you entered (if you selected the prompt option).
- 10 Think of a window with a license agreement. If you want the text of the license agreement to be displayed on the screen, check the "Display a license" option, then click "Browse" to select the document with the text of the license agreement, and then click "Open". Otherwise, click Next.
- 11
Click Add. This button is in the lower middle of the window. A new Explorer window will open, allowing you to select the files to be included in the installation EXE file.
- The files included in the installation EXE will be installed when the user runs the EXE.
- 12
Select the files to be included in the EXE file. Click on the folder with files on the left side of the Explorer window, and then select the desired files; to do this, hold down the left mouse button and drag the cursor over the desired files.
- You can also select files one at a time; to do this, hold down ^ Ctrl and click on each desired file.
- 13
Click Open. This button is located in the lower right corner of the window. This will add the files to the installation EXE file.
- If you need to add more files, click "Add" again and repeat the above process.
- 14 Click Next.
- 15 Check the "Default" box, and then click Next. It is located at the top of the window.
- 16
Think of a window with a closing message. This message appears on the screen when the EXE file installation process is completed. Check the "Display message" box, then enter the message text, and then click "Next".
- If you don't want the final message to be displayed on the screen, just click next.
- 17
Add the program to be installed. This is the program in the EXE file that was created earlier. Click Browse, open the file folder, click on it and click Save.
- If you want, check the option "Hide File Extracting Process Animation from User" (Hide the display of the process of extracting files) so that the installation file works without unnecessary visual effects.
- 18 Click Next three times. An EXE installation file will be created. The time for this process depends on the number of files you included in the installation EXE file.
- 19 Click Done. This button is located at the bottom of the window. The EXE installation file will be saved and ready to go.
- You don't need an EXE installer to run an EXE file, but an EXE installer will install an EXE file and any ancillary items (such as a "ReadMe" file, folders, and so on).
Warnings
- If you don't know how to code an EXE file, ask someone who knows how to program to do it.
Lately I've run into a problem. We were given a course project, I did everything perfectly, but it remains to make only the installation file, namely the .exe file.
The teachers gave us a very illegible program, but one smart person advised another, which is called Smart Movie Maker. He said that he had never seen an easier program for this task.
You will have a window like this: 
As you can see, the left side of the window is divided into two parts: Installer and Uninstaller.
As you already understood in the part called Installer there will be settings specifically for your installation file and in part Uninstaller respectively the settings for the file that will delete your program.
What I will tell you about the main characteristics for the installation file.
As you have already noticed, the .exe file has quite a few parameters. Let's talk a little about each.
Information:
You could immediately see it when you launched the program. I think there and so everything is clear what needs to be entered Program name, Version etc. I will only talk about the main ones.
Fill in all the titles and inscriptions too, because you will see all this when installing the program.
Compression type you can choose Maximum, because this will reduce the size of your installation file. As well as Breakdown type you can choose one file, so it will be easier for the user.
Files: I also marked the plus sign in the screenshot. By clicking on it, you must select the files that will be unpacked during the installation of the program, select only the main files of the program, you do not need to shove anything extra there.
Requirements:
At this point, you need to specify the requirements for your program. For example, the type of OS or additional software that should be installed on the computer.
Dialogues:
This window has four tabs: General, License/Information, Password and Completion. Dialogs are additional windows or items that will appear. For example, a window about the license agreement.
Interface:
Here you can design your installation window. Select the upper part of the menu or the central one, change the program icon and everything related to the program's graphical interface.
In principle, these are all the main points that will be required for the installation file.
And now to finish, to finally create the file itself, just click the button Compile.
As you can see the interface of the program is very simple and clear. So use it, I hope it helps you, as it helped me.
EXE is a format without which no one can do software. It performs all the processes of launching or installing programs. It can be both a full-fledged application, and be part of it.
There are two options for creating an EXE file. The first is the use of programming environments, and the second is the use of special installers that create different “repacks” and packages that are installed in one click. Let's take a look at both options with examples.
Method 1: Visual Studio Community
Consider the process of creating a simple program based on a programming language "Visual C++" and compiling it in the Visual Studio Community.
- Launch the application, go to the menu "File", then click on the item "Create", and then in the opened list on "Project".
- A window opens "Creating a project", in which you need to click first on the inscription "Templates", and then "Visual C++". Next, select "Win32 Console Application", set the name and location of the project. By default, it is saved in the Visual Studio Community working directory, in the system folder "My documents", but you can choose another directory if you wish. After completing the settings, click "OK".
- is running "Win32 Application Configuration Wizard", in which we simply click "Further".
- In the next window, we define the application parameters. In particular, we choose "Console Application", and in the field "Extra options" – "Empty Project", unchecking the "Precompiled Header".
- A project is launched in which you want to add an area for writing code. To do this, in the tab Solution Explorer right click on the label "Resource Files". Appears context menu, in which we successively click on "Add" and "Create Item".
- In the opened window "Add New Item" select item "C++ File". Next, set the name of the code file of the future application and its extension ".With". To change the storage folder, click on "Review".
- A browser opens, in which we specify the location and click on "Select Folder".
- The result is a tab with the title "Source.c", in which the code text is typed and edited.
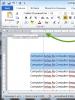
- Next, you need to copy the text of the code and paste it into the area shown in the image. Let's take the following as an example:
- To build the project, click on "Start Debugging" on the drop down menu "Debug". You can just press the key "F5".
- After that, a notification pops up, warning that the current project is out of date. Here you need to click on "Yes".
- When compilation is complete, the application displays a console window that says "Hello World!".
- The created file in EXE format can be viewed using Windows Explorer in the project folder.


#include
#include
int main(int argc, char* argv) (
printf("Hello World!");
_getch();
return 0;
}

Note: The code above is just an example. Instead, you must use your own code to create a program in Visual C++.


Method 2: Installers
To automate the software installation process, so-called installers are gaining more and more popularity. With their help, software is created, the main task of which is to simplify the process of deploying software on a computer. Consider the process of creating an EXE file using Smart Install Maker as an example.
- We start the program and in the tab "Information" edit the name of the future application. In field "Save as" click on the folder icon to determine the location where the output file will be saved.
- Explorer opens, in which we select the desired location and click "Save".
- Go to tab "Files", where you need to add files from which the package will then be built. This is done by clicking on the icon «+» at the bottom of the interface. It is also possible to add an entire directory, for which you need to click on the icon, which shows a folder with a plus sign.
- Next, a file selection window opens, where you need to click on the icon in the form of a folder.
- In the browser that opens, we designate the desired application (in our case, this is Torrent, you can have any other) and click on "Open".
- As a result, in the window "Add a note" The file is displayed with the path of its location. Leave the rest of the options as default and click "OK".
- The procedure for adding the source object to the application takes place, and a corresponding entry appears in a special area of the software.
- Next click "Requirements" and a tab opens where you need to mark the list of supported operating systems. Leave checkboxes in the boxes Windows XP and everything below it. Leave the recommended values for all other fields.
- Then open the tab "Dialogues" by clicking on the corresponding inscription on the left side of the interface. Here we leave everything by default. In order for the installation to take place in background, you can check the box "Hidden Installation".

- At the end of all the settings, start the compilation by clicking on the icon with the down arrow.
- The specified process takes place and its current status is displayed in the window. When the compilation is completed, you can test the created package or close the window altogether by clicking the appropriate buttons.
- The compiled software can be found using Windows Explorer in the folder that was specified during setup.


Thus, in this article, we found out that an EXE file can be created both using specialized program development environments, such as Visual Studio Community, and special installers, for example, Smart Install Maker.