How to fix Reboot and select proper boot device or insert boot media, No bootable device and similar errors. How to set the BIOS to boot from a disk or USB flash drive? What to do if the computer says reboot
The appearance of a message on the monitor screen containing the inscription Reboot and select proper boot device thoroughly confuses many users. The operating system cannot be started. But why? Further, it is proposed to consider the essence of this computer failure and apply several simple solutions to fix it. But to use them initially, at least approximately, you need to know what actually caused such an unpleasant failure.
Reboot and select proper boot error?
Actually, the very nature of the error must be considered from the point of view of a purely technical translation of the message that appears.
In this case, it offers to restart the computer and select the correct boot device. In general, the appearance of such a message indicates that it is impossible to start the OS from the hard disk. By the way, the second line in the message suggests inserting a bootable media and starting from it. Here it should be understood that there are many interesting tools on the recovery discs that allow you to fix such problems (for example, the command line as well). But first things first.
Possible reasons for the error
But why does a situation arise when a notification is issued with the text Reboot and select proper boot device? In the simplest and most banal case, this can only be due to the fact that the user installed for a removable device, and when restarting, he simply forgot to remove it from the drive or port. But the problems are not limited to this.
Among the most common reasons for the appearance of the inscription Reboot and select proper boot device are the following:
- lost settings of the primary system (BIOS / UEFI);
- errors or damage to the hard drive;
- violations of the bootloader of the system;
- penetration into the system of viruses;
- power supply malfunctions, etc.
BIOS settings and system boot options
The first step is to check the BIOS settings. In this case, the issue of restoring the system boot after checking the installed components is to specify the hard drive as the first device.

This is done in the Boot section, where a line is selected that contains something like Boot device priority or Boot sequence in the description. Here you just need to put the hard drive in first place or use the PageUp / PageDown selection keys on the first line. It goes without saying that after that the set parameters must be saved (F10 + Y).
However, even after that, the new parameters can, as they say, “fly off”. On desktop computers, when booting, the Reboot and select proper boot device line appears again. Why?

The case may be that the CMOS battery has expired, which is located on the motherboard and is responsible for storing the set BIOS parameters when the terminal is turned off. Conclusion: the battery just needs to be replaced. Indirectly, the cause may be damage to the power supply or power surges in the mains. Here you will either have to try to replace the unit, or install an additional voltage stabilizer.
The Reboot and select proper boot device laptop may issue for a completely different reason. Very often this is due to the presence of a primary UEFI system, and not a BIOS, when the user simply does not have time to use a keyboard shortcut to enter the settings interface. You will have to try to press the desired combination in time, but sometimes the inscription disappears, after which you can log in to the system, use the power settings and uncheck the quick boot item.
The system writes "Reboot and select proper boot device": hard drive performance issues
In some cases, when starting the download, you can use the F9 or F10 keys, which help you bring up the boot menu and select desired disk or device. But this method is suitable for a one-time start. But if the problem is precisely in the hard drive, and the Reboot and select proper boot device line appears constantly, you will have to take drastic measures.
Disk errors are not the worst thing. You can check the hard drive and correct its status from the command line when starting from the recovery disk (chkdsk / r / f / x /). But what if the failures are not software, but physical in nature?

You will have to make a check taking into account surface testing. To do this, one of the good tools is Hiren's Boot CD disk utility. Also, a console program can be used to check, but its use can only be justified when the hard drive starts to “crumble”. But the first utility fixes bad clusters and sectors instantly.
Bootloader corruption
Finally, another problem may be that the hard drive has corrupted boot area and boot tool itself.
Here you need to use again command line when starting from removable media (usually it is called through the Shift + F10 combination).

For recovery, the three commands shown in the image above are used. The first two are entered without fail, the third - if they did not give the proper result when the computer system was restarted.
The situation with the bootloader malfunctioning can also be associated with the impact of some types of virus threats (in this case, the appearance of the Reboot and select proper boot device start line is also possible).
But you need to deal with such things exclusively with the help of programs with the general name Rescue Disk, which are written to removable media ( optical discs or USB drives), and booting is carried out from them (naturally, with the installation of such devices as a priority for starting in the BIOS).
Instead of total
In general, only the main possible reasons for the fact that the start of the operating system is impossible were mentioned here. Unfortunately, it is impossible to immediately say what was the primary source of the failure, and what solution to apply to correct the situation. We'll have to act, as they say, at random. But, if you approach the issue purely for practical reasons, you should first check the parameters of the primary BIOS system, the status of the hard drive, and restore (or even overwrite) the boot record. Perhaps these steps will help.
If none of the above methods work, then you will have to change the hard drive, since critical errors can be associated solely with the fact that it began to fail. There is nothing you can do about it, and, of course, it is completely naive to hope for the use of the HDD Regenerator program. No matter how good it is, it is simply not able to eliminate absolutely all problems with a hard drive.
The computer turns on in semi-automatic mode. First, a black screen appears with brief information, then the system starts to boot. The user's first action is usually to enter a name and password in the Windows interface, until then his role is limited to monitoring the monitor. Everything changes when, instead of a system greeting, an alarm message lights up: “Reboot and select proper boot device or insert boot media in select boot device”. In this case, you will have to help the computer deal with the problem.
What does the message “Reboot and Select proper Boot device…” mean?
Translated into Russian, the inscription can mean something like this: "Reboot and select a working boot device, or insert bootable media into the selected boot device."
In some BIOS versions, a similar situation causes other text messages to appear: "No bootable device - insert boot disk and press any key" or "No boot device available". Their meaning is the same.
In simple terms, the computer was unable to fully boot on its own and is asking the user to change the getting started instructions in one of the following ways:
- Select a different (healthy) boot device.
- Insert a boot disk or other external drive (such as a flash drive) into the selected boot device.
Unfortunately, this message cannot be ignored, the computer will refuse to work until the cause of the problem is eliminated.
Why did the error message appear
The BIOS stores instructions for booting the operating system, which indicate which media the boot files are located on, as well as the priority of disk devices. Therefore, the error may be due to a problem with any of the elements of this chain.
BIOS error
- A BIOS crash due to a dead battery is a common problem with older computers. Typically, the battery outlives the PC, as it lasts more than five years, and devices are updated more often. But if system unit continues to serve the owner regularly for longer than this period, the battery is discharged, BIOS failures begin.
- Third party intervention. When trying to customize the BIOS for their needs, the user could enter incorrect instructions, the execution of which led to a failure.
- Poor power quality. Power surges can cause both BIOS errors and more serious consequences.
Drive issues
The main hard drive can also be a source of failure. Problems can be found with the drive itself, for example, its physical wear or breakage as a result of a fall, and with the key information stored on it - accidental deletion system files, Work malware. Do not forget about intermediate links: cables, adapters, cables, plugs and other little things that provide power to the disk and read information from it.
Problems with the power supply
A faulty or insufficiently powerful power supply can lead to a blackout of individual computer elements, including a disk with bootable system files.
How malware works
Computer viruses try to get as deep as possible into the system, so their activity or the work of anti-virus applications fighting them can lead to various problems, including the error “Reboot and select proper boot device or insert boot media in select boot device”.
How to solve a problem
Since there are many possible causes for the alarm message, you should exclude them one at a time until the true one is found. Let's start with simple steps, trying not to harm the computer.
Step 1Check DVD Drive and USB Ports
Most computers prioritize the drive and external device ports when determining the boot order.
This is done to be able to use emergency disks or flash drives in case of problems with the hard drive. The downside of this technology is a boot failure when the BIOS perceives a disk in the tray or a connected USB drive as a system one.
Therefore, we turn off all external devices and remove the disk from the DVD drive if it remained there, after which we try to reboot again.
Step 2Checking BIOS Power
A typical sign of a low BIOS battery is a regular reset of settings, including the current date and time. In addition, the settings are guaranteed to fail if you turn off the computer from the network for several minutes.
If such symptoms occur, you should replace the battery, which is located on the system board. This is a simple operation that requires only accuracy and precautions, including turning off the computer.
Step 3Checking Hardware Components
To check the sufficiency of the output power of the power supply, turn off all additional devices connected to the computer:
- external monitor;
- flash drives;
- Printer;
- network cable and other energy consumers.
In addition, you need to use stable power networks that provide sufficient power incoming current. If, after all the measures taken, the computer has successfully booted, you should either replace the power supply with a more powerful one, or reduce consumption by eliminating some of the external devices.
During the check, you should also pay attention to the hard drive activity indicator and the sounds made. If the indicator does not light up, most likely, the problem is hardware, that is, the power supply has failed or the cable has come off the drive. Also a characteristic sign of problems with the power supply is the regular loading of the computer only from the second or third time. If the indicator lights up, but the hard drive makes unusual sharp sounds, then it may be a drive failure. In both cases, it is better to take the computer to the workshop to check the operation of the components on the stand.
Step 4Setting up the BIOS
Incorrect BIOS settings can cause the system to attempt to boot from the wrong media. This problem is typical for computers that have more than one physical disk. Therefore, let's start the BIOS and set the right priorities.
- We go into the BIOS. When you turn on the computer, repeatedly press the "DEL" key. In some modifications, other buttons are used for the same purpose. Therefore, you should carefully read the messages that appear on the black screen.
- Go to "Advanced BIOS Features". The BIOS interface has remained unchanged for decades. On the first screen, select the desired item with the keyboard arrows and go into it by pressing Enter.
- Go to "Boot seq & Floppy Setup". The name of this item may be slightly different, as determined by the specific manufacturer. In such a situation, it is necessary to find the closest in meaning containing "Boot".
In extreme cases, you can simply go through the possible options until you find the right menu with options for disk devices.
- Open "First Boot Device". This item determines the boot order, and also shows the first drive or disk from which the BIOS is trying to boot in a minimized form. operating system.
- Determine the loading order. We mark “Hard Disk” as the first boot device if only one physical hard disk is installed, otherwise we select a specific drive.
- We save the changes. We press the hot key and confirm the intention in the next dialog box by choosing "Y". The computer will restart immediately.
The bottom line of the BIOS window contains hints for basic operations. One of them is about saving changes and contains the name of the command: "Save" next to the name of the function key. Most often it is F10, but there are other options.
Step 5Alternative Boot Device Selection
Some manufacturers embed the ability to call the boot device selection window using the function keys. The most common options: F10, F12, less often - F8 or F9. This method is also suitable if for some reason it was not possible to configure the BIOS according to the previously described algorithm.

Step 6. Boot from a rescue disk or USB flash drive
In order to check whether the system hard disk with the installed operating system and the information on it are not damaged, you need to boot from external media: a rescue disk or a flash drive with an installed OS.
Of course, a necessary condition for this method is the presence of such a carrier. If there is no rescue disk or flash drive, you can create them (using another, working computer) by downloading the necessary files from the site of antivirus manufacturers, for example, Dr Web.
By connecting a USB flash drive or placing a disk in the drive tray, we go into the BIOS again and set the boot sequence with the priority of the selected device. This procedure can be carried out using hot keys immediately from the boot window or manually by changing the parameters in the menu. Do not forget to return the boot priority from the hard disk after the system restore is completed.
Step 7. Check your computer with antivirus
A successful boot from the rescue drive indicates that the problem lies with the Windows hard drive. This can be a physical problem (breakdown or power failure) or a software problem, such as the result of malware.
We check the availability of the hard disk (using Explorer or another file manager find out if the system disk icon is reflected):
- If Windows does not see the hard drive, you can remove the cover of the system unit and find out if the connectors have moved away from the drive. If everything is in place, then it's time to take the computer to a service center, since it is necessary to check the power supply and the absence of physical damage to the disk, and this requires the appropriate tools.
- If the disk is available, then the cause is not a physical failure, but a software one, so you need to run an anti-virus program, usually added to the rescue disk. It is possible that this will be enough to solve the problem.
Fixing mistakereboot and select proper boot device - video
How to restore the Windows bootloader
BIOS recovery and access to hard drive ensure the relative performance of the computer by booting from external media. However, if the Windows bootloader is damaged, instead of normal BIOS operation, we will be greeted with another message “No boot device available - No bootable devices-strike F1 to retry boot, F2 for setup utility”. In a rough translation into Russian, it means "No boot device available - No boot devices - press F1 to restart the boot, F2 to call the configuration utility."
Before making a serious decision about reinstalling Windows, let's try to restore the bootloader. To do this, we will have to use the system restore utility. It is possible that this will be enough to solve the problem.
- We boot from the emergency media (disk or flash drive) according to the algorithm already familiar to us. You can also use the Windows installation disc.
- We are waiting for the screen with the installation of Windows.
- We select the active option "System Restore" in the lower left corner and go through it.
- Click on "System Recovery Options".
In total, there are two options in this window, the second involves using the previously created system rollback points. If they are saved on a disk or external media, then you can use them if our procedure fails. In the meantime, let's try to get by with restoring only the bootloader, for which Windows has a separate option.
- Choose from a list of operating Windows systems and click "Next".
- In the next window, select a recovery tool. We start the command line.
- Fix launch errors. We sequentially enter the commands, ending them by pressing Enter:

- Close the console window with the “exit” command and reboot.
If the problem persists, it remains possible to choose the option of restoring the system using backup points. This method will help even if Windows is damaged by malware.
Windows Boot Recovery - video
How to avoid an error
In order not to see such a message again on the screen of your computer, you need to follow some precautions:
- Computer care. It is necessary to monitor the hardware of the computer, change the BIOS battery in time (especially at the first date and time failures), prevent falls and other physical impacts on the components. An additional warning sign of problems with a hard drive can be a characteristic high-pitched sound.
- qualified intervention. Any tampering with the BIOS or computer hardware should be under the supervision of a qualified technician. Connecting additional components (video cards, hard drives, drives, and so on) must be consistent with the output power of the power supply.
- Antivirus protection. Protect your computer from malware with antivirus program trusted manufacturer.
- Reservation. It is necessary to regularly save important information to external media, as well as create backup system restore points.
- Tools. The "emergency kit" must certainly contain bootable media (disk or flash drive).
A black screen when you turn on the computer instead of a friendly Windows splash screen does not always mean a fatal error. For starters, you can try to fix the problem yourself. If the problem cannot be corrected, contact the service center. Qualified specialists will definitely help you.
There are situations when a personal computer does not turn on in the usual way: after loading, the Windows desktop familiar to an advanced user does not appear on its screen. Instead, on a black background, there is only one message of a dull light gray color "Reboot and select the correct device ..." (aka Reboot and select proper boot device). It becomes clear: a problem has arisen that can and even needs to be urgently addressed. However, before proceeding to correct the error, it is advisable to make sure that you understand exactly what and why you will do.
What is BIOS and Boot Devices
It is known that a computer is controlled by a central processor, which executes program code located in volatile memory. Regenerated memory stores programs and data only when power is applied to it, namely when the computer is turned on. Part of the address space of volatile memory is occupied by the constant B.I.O.S. (Basic Input/Output System), which stores data and the firmware it contains even when the computer is turned off.
The computer is running an operating system (for example, Windows), which is a kind of intermediary between user applications and the BIOS (if Windows does not work directly with certain devices, bypassing the BIOS). Since the amount of permanent BIOS memory is very limited, when the computer is turned on, only a small program contained there is launched. It is responsible for loading the operating system from a permanent storage device, the volume of which is capable of supporting its storage and operation.
The BIOS specifies the priority of boot devices from which the operating system is loaded into RAM. Such devices may include:
- hard drives (HDD, SSD);
- storage media connected via the USB interface;
- network cards (to run the operating system through a computer network);
- devices for reading (writing) optical discs (CD, DVD).
The latter are used as devices from which the PC boots. Most often - in order to install the operating system, less often - to access any data on the hard disk in cases where it has become impossible to boot the operating system from the usual media.
What does the message Reboot and select proper boot device say
The BIOS diagnostic message, translated as "Reboot and select the correct device to boot" and prompts the user to restart the personal computer. After that, it recommends choosing the correct boot device or inserting into the already selected device a storage medium from which it will be possible to boot. When everything is done - press any key.
the hard drive itself is faulty.
How to solve a problem
In trying to solve a problem, move from the easiest way to the most time consuming.
Reboot with Disable USB Devices
This is the easiest way to solve an error that occurred during the computer boot process. It can work in cases where, for some reason, storage devices connected to USB or an optical drive are specified as the first and second boot devices in the BIOS, as a result of which the BIOS does not reach the third boot device, which is set as hard disk with installed operating system.
To restore normal Windows boot in this case, it is enough to remove all devices connected to USB and CD (DVD) disks from optical drives from the hard disk. In this case, however, it is still desirable to correct the order of boot devices in the BIOS.
Via BIOS
If the simplest method above did not help (and there was little hope for it), it is advisable to run a program that allows you to change BIOS settings and make sure that the internal hard drive with the Operating System installed is in the list of visible drives. To implement this bold plan, you must run the BIOS Setup program immediately after turning on the machine.
To start the BIOS setup utilities, during the computer startup process, at the time of initial initialization, when an inscription similar to the one you can see in the picture below appears on the screen, press the hot key to launch the BIOS Setup Utilities (in this particular case, the Delete key).
However, there are also PC models that use other buttons as a hot key to launch the BIOS setup program. These buttons are F1, F2, F10, Esc. Sometimes it can even be key combinations - Ctrl+Alt, Ctrl+Alt+Esc, Ctrl+Alt+Ins, etc.
You can find out the key (or key combination) used for the desired program on your computer by determining the BIOS version, information about which is displayed on the screen in the very first line that appears during the PC startup process.
To almost certainly run a program that allows you to change BIOS settings, you should do the following:
- Decide which key (key combination) calls up the BIOS setup menu on your computer.
- Press the computer's power button.
- With an interval of about half a second, briefly press the required button or combination of buttons until the BIOS Setup starts. This operation can take up to ten seconds. If we reduce this interval and press more often, a keyboard buffer overflow may occur, which is absolutely not what we want. And if you press less often, the fact that you press the right key can mysteriously elude your computer's initialization program.
Even if you were not able to determine exactly which key (key combination) on your computer starts BIOS Setup, you can simply repeat the proposed algorithm for all the above buttons and their combinations in sequence and thus select the desired option.
Entering the BIOS on different devices: video instruction
Where exactly you can make sure that the bootable hard drive with the installed operating system is visible to the BIOS depends on the developer and version of the BIOS Setup program on your computer.
If the BIOS Setup does not enable the option to display a logo instead of standard diagnostic messages during computer startup, information about hard drives found in the system should be displayed on the monitor. Thus, the visibility of the hard disk for programs can sometimes be verified even without running the BIOS Setup program.
In order to check the visibility of the disk from the BIOS, you need to run the BIOS Setup program and find in it a list of all hard disks installed in the system (the system means your computer). The list of hard drives found in the system is displayed on the first page, immediately after starting BIOS Setup.
Examples of hard drives found in the system: gallery
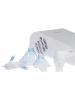
No hard disk was found in the system. Here the disks are four consecutive rows marked with blue triangles. One disk is visible in the system - SAMSUNG SP2004C (Third Channel Device 0) Here the disks are marked with blue triangles in the same way. One hard drive found in the system - SAMSUNG HD160J (Third Channel Device 0) One IDE Primary Master drive found, model WDC WD2000JB. IDE Secondary Master (CDU5211) is an optical drive
The list of all hard drives found in the system can not always be found in the Main tab of the BIOS Setup program. To see it, sometimes you have to go to the Advanced tab.
In this tab, press the Enter key when the IDE Configuration (or SATA Configuration) link is highlighted, and you can see a list of hard drives.
If the hard drive is not visible from BIOS Setup
If the hard drive is not visible from the BIOS Setup, this may indicate either a lack of good contacts in the interface and (or) cables feeding the hard drive (well, if this is the case), or a malfunction of the computer's power supply (which is worse), or failure of the hard drive (and this is already very bad).
The simplest thing to do in this situation is:
- Turn off the computer from the power supply.
- Switch off and on again the old interface and hard drive cables several times.
- Turn on the computer and try again to see the hard drive with the installed operating system from the BIOS menu.
If this does not help, you can do the following:
- Purchase new, known to be working interface and power SATA cables (if HDD/SSD with SATA interface), or IDE cable (if HDD is connected via IDE interface).
- Connect the hard drive with the installed OS using known-good cables.
- Turn on the computer and try again to find the disk through the BIOS.
If nothing has helped now, this indicates a malfunction of either the power supply or the hard drive itself.
In this case, you can take somewhere, at least temporarily, a known-good hard drive and try to see it from the BIOS. If it is not visible either, this most likely indicates the need to replace (repair) the computer's power supply.
But if a known good hard drive is visible from the BIOS, this is the most difficult case. This means that your disk has failed, and this is fraught with the irretrievable loss of all information stored on it.
If the disk is visible from the BIOS
The hard drive with the installed operating system is visible from the BIOS. In this case, it is advisable to specify it as the first or only boot device, and then try to restart the computer. If the error persists, the Windows Boot Loader (MBR) is probably corrupted. The case of a corrupted bootloader is discussed in more detail below.
You can usually specify a hard drive with an installed operating system as the first or only boot device using the BOOT tab of the BIOS Setup Utilities program. The pictures below show examples of menu items for various programs that specify the order of boot devices.
In the figure below we see the tab of the AMI BIOS Setup program, designed for boot configuration. The selection of the menu item of interest is carried out with the up and down arrows, the transition to it is by pressing the Enter key. Going to the Hard Disk Drives item, we see a list of disks found by the program on the computer.
We are interested in the item Boot Device Priority (“Assigning the priority of boot devices”).
In the screenshot below we see the BIOS Setup page developed by AMI, designed to specify boot priority and select boot devices. 1st Boot Device translates as "First Boot Device", 2nd Boot Device - as "Second Boot Device", etc.
As you can see from the tooltip on the right side of the picture, the up and down arrow keys are used to select the boot device number, to select one or another device from among those found in the system, you must enter "+" or "-". To save the changes and reboot - press the F10 key. If the changes made for one reason or another are not worth saving, you should press the Esc key.
In the above list of devices, the first boot device is already selected, so in this particular case, you should press the “-” key until SCSI: # 0300 ID00 LU is written in square brackets opposite 1st Boot Device (and this is the only hard drive). Next, press the down arrow to configure the second boot device and press the "-" key until the word None appears in square brackets next to 2nd Boot Device. Then repeat the selection of None for the remaining boot devices - the third, fourth, fifth and sixth.
In the screenshot below, we see the tab of the BIOS Setup Utility program, developed by Phoenix, designed to select boot devices and assign a boot order.
As can be seen from the tooltip specific to this menu item, located on the right side of the program window, the developer has provided several keys that will be convenient to use for viewing or crashing devices. Here are the keys with their purpose:
- Enter ("Enter") - adds the selected device group to the boot process or removes it from it;
- Ctrl+Enter - adds everything;
- "+" or "-" - moves devices down or up;
- n - can change removable devices between Hard Disk or Removable Disk;
- d - removes a device that does not exist.
The following photo shows how to set the order of devices that the PC should attempt to boot from in Award Software's CMOS Setup Utility.
First Boot Device should be understood as "The first boot device", Second - the second, Third - the third.
This or that device can be selected using the arrow keys, and then, by pressing Enter (“Enter”), set exactly the device that is required. In our case, you should select Hard Disk ("Hard Disk").
If, by manipulating the BIOS settings, you managed to restore the normal boot of the operating system, it would be useful to take measures to keep it that way.
If the BIOS settings become incorrect (before you corrected them), there must be some objective reason for the failure. It can also be a person (for example, a child) who accidentally reconfigured the BIOS. It can also be a battery that powers the memory for BIOS settings - CMOS. And as stated in the film "The Matrix", people - this is, after all, in fact, batteries ... But now and here - not about that.
If, after turning off the power of the computer (or pulling out the battery in the laptop), the system startup error resumes, you should check the battery that powers the motherboard for operability (in most cases there is only one, and it cannot be confused with anything). It looks like the one shown in the photo below.
In order to check the battery for operability, it must be carefully removed from the corresponding compartment, and then measure the voltage that it is still capable of using a device called a multimeter, as shown in the following photo.
A new battery should give out a little more than three volts, if it says so on it, therefore, according to the readings of the device in the photo, it can be seen that this particular battery is clearly not capable of anything. Such a battery, of course, needs to be replaced with a new one.
Alternative download options
If you need to use the computer “by all means” and urgently, despite the fact that the operating system does not boot from the hard disk installed in the computer, you can quickly boot from an external storage medium without even changing the order of boot devices in the BIOS Setup menu or CD (DVD) disc.
Accordingly, for this you need to have a bootable USB-flash drive or a bootable live CD (DVD). Turning on the computer this way can allow you to quickly access any important data stored on your hard drive, for example.
You can organize such a download by calling the boot menu during the boot process by pressing a hot key. The boot menu allows you to "on the go" select the device from which you want to boot your computer, and hot key highly dependent on the manufacturer motherboard, as well as from the BIOS developer.
Below is a list of hotkey options for calling the boot menu (Boot Menu).
Notebooks:
- Lenovo, Acer, Dell, Toshiba, Fujitsu - F12;
- Asus, Asus AMI, Samsung - Esc;
- HP - Esc, then F9;
- MSI, Sony - F11;
- Asus Phoenix Award - F8.
Desktops:
- FoxConn, Intel Phoenix-Award - Esc;
- GigaByte, GigaByte Award - F12;
- MSI AMI, AsRock AMI, ECS AMI - F11;
- BioStar Phoenix-Award - F9.
other methods
There is one more good way restore the performance of a personal computer that issues the error Reboot and Select proper Boot device or Insert Boot Media in selected Boot device and press a key instead of the normal boot of the operating system.
You can purchase a new hard drive (preferably an SSD), install a new operating system on it, and make it the only (first) bootable drive. However, if this does not save, you still have to change the power supply after that.
If the Windows bootloader is damaged
The Windows bootloader is called in other words MBR (Main Boot Record - Main Boot Record). This entry is most often corrupted due to an incorrect shutdown of a computer that is running Windows.
To avoid accidental incorrect disconnection of the computer from the mains, it is desirable to connect the computer to the network via a UPS (uninterruptible power supply). The photo below shows several such sources.
The moment the computer is turned on, the Power On Self Test (POST) begins, performed by the BIOS. After passing the POST, information about the BIOS version or computer model and the devices found in it is displayed on the screen, after which the screen is cleared and an attempt is made to boot the operating system.
If the master boot record is corrupted, the operating system will not load, and instead you may see one of the following messages on the screen: Invalid Partition Table, Error Loading Operating System, or Missing Operating System. system).
In addition to an incorrect shutdown of the computer, the MBR can be damaged due to hard disk errors, driver errors during Windows operation, or due to the activity of a virus. To repair a damaged MBR, the Windows Recovery Console is used, in which the fixmbr command is executed.
To begin with, in order to restore the MBR, you will need a distribution kit of any edition of Windows of the same version, the bootloader of which turned out to be corrupted. Consider the recovery process using the example of Windows 7 "step by step".
If you refresh the memory of the causes of the error, you can easily and with a good chance of fidelity suggest how you should try to eliminate these causes.
The first reason is incorrect settings for the order of boot devices in the BIOS. As already mentioned in this article, the reason for such settings can be either an expired CMOS battery or someone else's wrong actions.
As for the latter, as a preventive measure, we can recommend the correct and effective organization of access control to the computer (for example, setting a password to enter BIOS Setup). An even more serious measure is to install a lock on the computer case so that the BIOS settings cannot be manually reset.
The life of the CMOS battery on modern motherboards is between 2 and 6 years, so it can be advised to check its condition every 2 years. However, it should be remembered that by removing the battery from the motherboard, you are actually simulating its discharge, so when it is checked by the device, the BIOS settings will be reset to the original ones anyway, so it is likely that many of them will have to be restored, which sometimes very troublesome.
However, it is possible to determine the inoperability of the battery by the symptoms, and not only by measuring the voltage. If, after disconnecting the computer from the network (removing the battery from the laptop), correct information about the current date and time is lost, this most likely indicates a discharged CMOS battery.
To prevent damage to the Windows bootloader, it is first of all desirable to correctly shut down Windows, as well as the computer. To avoid accidental shutdowns due to an unexpected loss of power, you should power your desktop computer from an uninterruptible power supply.
In order to avoid situations with the loss of contact in the cables, it is necessary to exclude the transmission of vibration to these cables by correctly attaching them to the load-bearing parts of the case, and also regularly clean the computer from dust.
In order to increase the life of the computer's power supply, it is advisable during the computer assembly process to select a power supply with a significant excess of power and, of course, from among recognized and excellently proven brands.
Considerations on the subject of trademarks will rightly be attributed to the selection of hard drives. As for the latter, it is also necessary to note here: the HDD is extremely sensitive to sharp shocks, and sometimes even to strong shaking. Therefore, for example, a laptop equipped with an HDD is more reliable even when moved from place to place in the off state.

So, we figured out what to do if the Reboot and Select proper Boot device error occurs on the computer. Realized the essence of the error, understood what it is fraught with. They also learned about the possible causes of its occurrence and methods for both correcting the error itself and reducing the risk of encountering it. Hopefully, you were able to solve your problems and the annoying error will no longer interfere with your work.
It's nice when a computer starts every day without problems and allows its owner to perform tasks, have fun and much more. Unfortunately, sometimes even during an attempt to start the operating system, the message “No bootable device insert boot disk and press any key” may appear on the computer screen, which does not allow the equipment to be used for its intended purpose.
Therefore, you need to start looking for a solution to the problem. You can do this by reading this material.
What does the No bootable device insert boot disk and press any key error mean?
The first step in the methodology of the upcoming treatment is to understand what this error means.
An approximate translation of the phrase from the message allows you to get information that when you try to start the system, the computer accesses the device on which it is located, but cannot connect to it. Next, the PC asks the user to insert a boot disk and press any button to continue the operation.
That is, the phrase “No bootable device insert boot disk and press any key” actually signals to the user that there is no access to the hard drive being used.
There are several reasons for this situation:
- Drive problems caused by physical impact (for example, the PC was accidentally dropped or moved carelessly from one place to another).
- Temporary, non-systematic failure.
- Consequences of exposure to malware.
- An attempt was made to boot from a drive that is not listed as a priority in the hardware settings.
- The battery on the system board has expired.
- Problem with USB ports when trying to use this type of connection.
- Problems with the operating system itself.
Based on the root causes described above, you can try to correct this not the most pleasant state of affairs.
Several troubleshooting algorithms
So, the easiest way, which often allows you to correct this situation, is to simply restart the equipment. If a normal failure occurs, then this procedure should help.
The next step is to remember if there was any physical impact on the system unit? If yes, then it is recommended to remove the side cover, find all the connections of the hard drive you are using and check them for reliability. It is important to make sure that the cables are correctly connected not only to the hard drive itself, but also to the motherboard.

The third stage is the exclusion of PC attempts to boot the OS from other sources. For this you need:
- Remove all discs located in CD or DVD drives;
- Temporarily remove all external drives;
- Initiate another hardware restart.
If a person tries to start the system using a drive connected via a USB port, then it is recommended to try reconnecting it using a different USB, since there are usually a fairly large number of them on modern computer units.
The fifth step is to check the download priority. In some cases, this particular setting can lead to a similar situation:
- Start restarting the device;
- Press "Del" to go to the BIOS menu;
- Go to the section responsible for determining and prioritizing the devices used (Most often you should look for the section with the word “BOOT”);
- The first in the list should be the device on which the operating system is located. If this is not the case, then you need to swap the equipment.

If the BIOS does not see the desired device at all, and the user is sure that the connection is correct and reliable, then most likely the hard drive is faulty.
Solution: sending the hard drive to the service and, quite possibly, purchasing a new device.
Sometimes in a situation with a similar error, you may notice that the changes made in the BIOS settings are rolled back during each next restart of the PC. This is a clear sign of a battery problem. You will have to replace it, since you can do it yourself, and the cost of a new product is minimal.
If the hard drive is perfectly detected by the hardware, has the desired priority, then there is another option for correcting the “No bootable device insert boot disk and press any key” status. True, for this you need to have a boot disk or its equivalent on a flash drive at hand:
- Insert a disk into a drive or connect a flash drive.
- Go into the BIOS and set the startup priority from the boot disk / flash drive. Save changes, restart computer.
- After starting the program, go to "System Restore".
- Select command line.
- Force three commands to be executed in turn: bootrec /fixmbr, bootrec /fixboot and chkdsk: /f /r

If none of the proposed methods brought a positive result, then, unfortunately, you will have to carry the equipment to a specialized service and, possibly, buy a new hard drive.

Most often, we remember the BIOS (Basic Input / Output System) only when we need to reinstall the operating system and need to somehow set it to boot from a disk or flash drive. I often wrote about this in articles such as:, and others. Now I want to gather together and refer only to this article when necessary. This article will be useful for all BIOS versions and for different companies. A sort of single guide
The first thing you need to know is that the BIOS is divided by manufacturer and version.
To change boot method in BIOS- you need to enter it first.
You can, of course, find out what version and manufacturer of your BIOS is from the manual that comes with your computer.
You can also find out by looking at the line at the top on the black screen during boot (the manufacturer will be indicated there).
Well, then enter the BIOS, knowing what it is for you.
In some BIOS versions there is no such screen showing lines. There is just a logo there and something like "Press F2 to enter SETUP" is written below, which means we press F2. If there is just a logo and there are no inscriptions - press ESC, and then del or f2
Here is a small list of manufacturers and keyboard shortcuts for entering BIOS:
Also, at the bottom of the black screen, keys are written to enter the BIOS and to display a list that contains available devices for booting and so that you can boot from it. But about him at the end of the article.

As you can see - most often you need to press the key F2 or Del.
Now you need to put a USB flash drive or disk into the boot.
Let's look at several examples that differ from the BIOS manufacturer.
Configuring Award Bios to boot from a USB flash drive or disk:
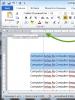
The main window is like this, in which we need the second item:

Further depends on the firmware version. In one case, you will need to go to an item similar to "Boot Seq & Floppy Setup"

in another case, you don’t need to go anywhere - everything will be in front of your eyes anyway

clicks on First boot device(First boot device), click Enter and this window will appear

in which you need to select a disk or flash drive that will be launched first. You can specify the Second boot device, for example, but usually the BIOS itself fills in this data.
On a note:
If you choose a flash drive, then, among other things, you also need to go to the “Hard Disk Boot Priority” item and move our flash drive to the very top using the “+” and “-” or “PageUp” and “PageDown” buttons:

It is also worth remembering that in order for the BIOS to see the USB flash drive, you need to connect it before turning it on or before rebooting
Then press "F10" (see the exact key in the prompt at the bottom of the screen with the name "Save", "Exit") or go to the main BIOS menu and select the "Save and Exit Setup" item. In the red box, select "Yes" with the "Y" button on the keyboard and press "Enter"

The computer will restart and when booting from the Windows installation disk, such a request may appear for a few seconds “Press any key to boot from CD or DVD…”

Which translates to "Press any button to boot from CD or DVD."
This means that if at this moment you do not press any button on the keyboard, the computer will continue to boot from the next device in the list.
Another variation of this bios:
I only met this on old computers ten years ago until 2003. The main menu looks like this:

To set the boot order, you need to go to the menu BIOS FEATURES SETUP:

At this point, just select with the PageUp and PageDown buttons (or Enter and arrows) what to set first - a CDROM or a USB flash drive. DO NOT forget about the second and third device
And further:


How to choose what to boot from in AMI BIOS
If, upon entering BIOS, you see such a screen, then you have AMI BIOS:

Using the right arrow key on the keyboard, move to the Boot tab:

We go to "Hard Disk Drives" and in the line "1st Drive" (may be called "First Drive") select a disk or flash drive:

Next, go to "Boot Device Priority", go to "1st Boot Device" and select from the list what you chose in the previous tab (i.e. if you chose a USB flash drive in Hard Disk Drives, then you need to specify it here. This is important! )

To boot from a CD/DVD disc, you need to select "ATAPI CD-ROM" (or simply "CDROM") in this menu, and there is no need to go to the previous menu "Hard Disk Drives".
Now we save the results with the "F10" button or go to the "Exit" BIOS section and select "Exit Saving Changes".
Another AMI BIOS, but here everything is clear:

Setting up Phoenix-Award Bios to boot from a USB flash drive
If, upon entering BIOS, you see such a screen, then you have a Phoenix-Award BIOS:

Go to the “Advanced” tab and opposite “First Boot Device” set what you need (flash drive or disk):

Save with F10

Configuring EFI (UEFI) Bios with a GUI to boot from a flash drive
Now this is no surprise to anyone. Almost all new computers are supplied with a similar shell. You can read more about it in the article.
When loading, at the bottom of the screen there is a "Boot Priority" section, where you can use the mouse (drag and drop) to set the desired boot order.
You can also click on the "Exit/Advanced mode" button in the upper right corner and select Advanced mode in the window that appears.

Next, go to the "Boot" tab and in the section Boot Option Priorities in the "Boot Option # 1" field, set the USB flash drive, DVD-ROM, hard drive, or other available device as the default boot device.

How to boot from a USB flash drive or from a disk without entering BIOS
This is what I wrote about almost at the very beginning of the article.
This is when you need to press the key once and a window will appear with a choice of download. This method does not change the BIOS settings.
Usually Award BIOS offers to press "F9" to call the boot menu, and AMI asks to press "F8". On laptops, this may be the "F12" key.
In general - look at the bottom line and look for items like "Press F8 for BBS POPUP" or "Press F9 to Select Booting Device after POST".

Why can't I boot from a USB flash drive into the BIOS?
Possible reasons: 
On ancient computers, there is generally no way to boot from USB flash drives. If there is no newer BIOS, then the project can help.
1) Download from the link above latest version"Plop Boot Manager" and unpack.
2) The archive contains files: plpbt.img is an image for a floppy disk, and plpbt.iso is an image for a CD.
3) Write the image to disk and boot from it (or from a floppy disk).
4) A menu will appear in which we select our USB flash drive and boot from it.
Little decoding of disk designations when choosing:
Do not forget after you have done what you wanted (namely, why did you change the boot in the BIOS) - return the boot settings back so that the computer boots from the hard drive.