Ways to turn on iPhone. iPhone setup: Easy steps to save money. Spent all mobile data
Today it's hard to imagine cellular telephone not connected to the internet. Find out the latest news, weather, chat in in social networks, learn something new through Google is available to you, if available Mobile Internet. In order to freely use the worldwide web, you need to know how to turn on and off the Internet connection on an iPhone 5, 5s, 6, 6s.
You can connect to the Internet through a mobile operator and through a Wi-Fi connection. In the first case, you need to be in the coverage area of your mobile operator. For the connection itself, you need to go to the cellular section in the phone settings. Opposite the cellular data column, drag the slider to the “on” position. It will change color to green.
After this operation, the connection to the Internet occurred. But at low speed, 2G. This speed is enough to check mail or chat via WhatsApp. But this speed is definitely not enough to use the search and download applications. The disadvantage of this generation of data transfer is that at the time of using the Internet resource, calls will not reach you.
To enable 3G or LTE, you must be in the coverage area and have a device that can work in this mode. This connection occurs in the same way in cellular communications. Where you need to go to "data options" and then go to "voice and data". And put a birdie next to the corresponding generation of data transfer.
If you have an iPhone 4, then only 3G connection will be available to you. This phone model does not support the fourth generation of data transfer. If you are the owner of the 6th iPhone, then you can easily use the LTE network if you are in the coverage area.
The second way to connect the Internet on iphone is via Wi-Fi. Using this feature makes it easier to work on the network, removes the worry about the traffic limit and is just convenient. This connection allows you to use the Internet at high speed. There are many sources for such outputs today: this is your stationary modem at home, and the distribution of the connection in your favorite cafe, and even your flatmate.
If your version operating system IOS 7 or higher, then two connection options are available to you.
1 First you need to turn on your iPhone and swipe up from the bottom of the screen. An additional panel will appear. In this panel, click on the Wi-Fi connection image located second from the left. Once activated, it will change color. 2 The second method is carried out in the phone settings. Go there and open the "Wi-Fi" option. While in it, you need to switch the toggle switch to the “ON” position, set the network parameters and password. Disabled access will be displayed in gray.If, when using a home router to distribute the Internet, he asks to write down the DSN, then you need to click the button located to the right of the network display. Next, make the necessary adjustments. In a situation where the Wi-Fi setup is done correctly, but there is no connection, select "forget this network" in the settings. Fill in the settings again. After that, it is better to restart the smartphone and router.
Settings active but not connected

The first thing to do is to check the operation of the SIM card. If the cellular network display has one band or none at all, then this may be the reason for the lack of an Internet connection. This problem is solved by moving the phone to a higher quality coverage area. Simply put, find a place where the signal is better.
Balance check. This is necessary for those who do not have unlimited traffic usage. In such a situation, the disconnection is the result of the funds on the balance of your smartphone going into the red. It is better to use unlimited traffic for Internet surfing. This will allow you to save money and not worry that the Internet can turn off at any time. To select a suitable package, check with your telecom operator.
If the activation steps are performed correctly, the balance is normal and the signal is excellent, but there is still no connection to the World Wide Web, it is necessary to correct the data. If this is not done, then you can start the Internet many times, but there will still be no sense.
Correcting data settings is necessary for your mobile operator. To do this, in a cellular connection, you need to open the "data settings". Next, in the cellular data network, we find the option of cellular data. In the window that opens, you need to enter the data in the columns: APN, Password, username.
Each mobile operator has its own data. In order to correctly fill in these fields, you need to clarify this information with your mobile operator. You don't have to go to the head office for this. Such settings can be obtained via SMS. Or by calling the service number.
If you plan to use your iphone 6 as a modem, then the information received from the telecom operator must also be filled in the fields that are in the “modem mode” option.
Turning off data transfer on your smartphone is easy. You need to drag the slider to the "OFF" position in the Cellular Data option.
Using iPhone 6 as a modem
You can set up the Internet not only for reception, but also for distribution. The developers of Apple smartphones made sure that the phone can be configured to give the Internet to others.
Setting up this mode is easy. To do this, you will need to open the "tethering mode" in the settings. If this mode is not displayed, which is often found in model 6, then it can be found in the cellular option. Next, go to the cellular data network. Going through the list, you will find the option "tethering mode". The fields are filled in here: APN, Password, username. This information has already been used by you in other settings.
Ready. You can not only receive Internet data, but also give others the opportunity to access the network through your device.
I'll show you how to set up an iPhone from the very first turn on. I will show you how to create an Apple ID, set a password and other first difficulties.
1. Turning on the iPhone for the first time.
First, turn on the iPhone. Press and hold the power button on your iPhone for 1-2 seconds. On older versions of the iPhone (iPhone 4,4s,5,5c,5s) it is on top, on new ones (iPhone 6, iPhone 6 Plus) it is on the right. A white apple on a black background will appear first, and then a greeting in different languages: Hello, Greeting, and so on. We need to swipe from left to right to start the first setup of the iPhone.
First you need to select the language of the iPhone and the language of its interface. Click on the language in which you want to set the iPhone. I will choose Russian.


Enable or disable geolocation. Next, you can turn on geolocation to turn on the GPS module on your iPhone and it will determine where you are in order to offer you, for example, the weather of exactly the place where you are at the moment or the nearest store, or set you the current time zone when you move from one city to another or from one country to another. Or to determine where you are at the moment, so you can find yourself on the map. Also, the iPhone can remember the places you visit frequently and monitor your movement. I wrote about this in an article.
But the GPS module consumes battery power and we do not need it at the moment, so I will disable it by selecting disable location services. Geolocation can be enabled later or allowed for a specific application at the time of its operation.


Now we come to the step of using an existing Apple ID or creating a new Apple ID.
2. Create an Apple ID.
If you haven't had an iPhone or iPad yet, or if you want to create a new Apple ID, then choose to set it up as a new iPhone. If you already have an Apple ID and want to use it, then choose Restore from iCloud copy or Restore from iTunes copy. I talked about iPhone recovery in an article.
I will show you how to set up an iPhone with a new Apple ID and choose set up like a new iPhone.

An Apple ID is your account on iOS (iPhone or iPad) to be used on Apple devices.

With your Apple ID, you can make purchases for apps, music, movies on your iPhone, send free imessages (SMS messages between iPhones and iPads), make FaceTime calls ( free videos calls between iPhones and iPads) and so on.

In general, without an Apple ID, neither here nor there, and its presence is mandatory.


Now select your first and last name.


You need an address to create an Apple ID Email. You can specify your existing mailbox, various notifications about buying applications in the AppStore (when you make them), security notifications and other letters from Apple will come there.

You can create a new mailbox on an Apple server and link the new email box to an Apple ID. To do this, select get free e-mail in iCloud and click next.

Now let's come up with your new e-mail. It will be of this type: [email protected]. This will be your Apple ID login.

To switch the keyboard from Russian to English, click on the globe icon at the bottom left.

After you have come up with an e-mail, click next.

Confirm the creation of an e-mail by clicking create.

Now you need to create a password for your Apple ID. The Apple ID password cannot be less than 8 characters long and must contain at least one number, one uppercase letter, and one lowercase letter.
That is, the password should be like: Genadii6 or Kartohul0 or 4etyResta or dvustoroniiDild0.

After you come up with good password and confirm it, click next.

Now you need to choose security questions and come up with answers to them. Security questions are used to identify the user when the data account changes are made.
Click on select a question.

Can choose:
- childhood best friend name
- name of your first pet
- the first dish you learned to cook
- the first movie you saw at the cinema
- where did you first fly by plane
- the name of your favorite teacher

I chose the question the name of my childhood best friend and answered it. The answer can be absolutely anything. The main thing is that you remember this answer if something happens to your Apple ID account.
After choosing a question and answering it, click next.


And finally, the third question and answer and click next.

Now we specify a backup mailbox, in case your main e-mail is not available to you, you can restore access to your Apple ID through a backup mailbox. This e-mail will be used for security purposes only.

Once you have entered your email address, click next.

Now setting up updates. Get Apple news and software updates, as well as the latest information about Apple products and services.

I do not want to receive news and information from Apple in my email, so I will disable these updates.

Now accept Apple's terms and conditions. Read and click accept.

We confirm acceptance of the terms and conditions of iOS, iCloud and Game Center.
We press accept.

The creation of a new Apple ID begins. We wait a few seconds or minutes.

Now we are prompted to use iCloud. iCloud is Apple's cloud storage, it allows you to have automatic access to music, photos, programs, contacts, calendars and more on all your devices.
If you do not have a computer, then you definitely need to use iCloud to save your contacts and music and programs to your iCloud account and in case you lose your iPhone or iPad, then you could buy a new iPad or iPhone to restore your contacts and photos and programs on a new iPhone or iPad.
If you have a computer, then you can save your iPhone or iPad backup, which will store your contacts, photos, programs, and more, to your computer via iTunes.
I'll click don't use iCloud

Confirming that I really don't want to use iCloud.
Click don't use.

3. Create a password for iPhone
Now you need to create a password for your iPhone or iPad so that no one can take it, climb into you and watch your photos, videos, correspondence and other personal information.
First, create a simple four-digit password.

Confirm the newly created password by entering it again.

Later, you can change your iPhone passcode if you want. You can even set a complex password consisting of numbers and letters in different languages. I already wrote about this earlier in the article.
4. Diagnosis and use.
Now let's configure the "Diagnostics and Usage" item. Automatically submitting diagnostic and usage data will help Apple improve its products and services. Diagnostic data may contain geodata.

That is, you can help Apple by clicking "send automatically", then periodically your iPhone or iPad will send usage data to Apple: in which applications and how long you sit, where you are, where you click, what settings you use, what you write and so on. All this helps to understand who and how uses their products. If you do not want your data to be sent periodically to Apple, then select "do not send".
I choose "don't send".
I wrote about sending statistics to Apple and other tracking on an iPhone in an article.

iPhone. Welcome!
Click to start working.

Ready. Your new iPhone or iPad is set up and you can start using it.

5. Turn on mail on iPhone
You can first turn on mail by going to Settings > Mail, Addresses, Calendars.
Setting up the Internet on an iPhone (4, 5, 6, 7, 8, X, SE) is a delicate and delicate process. Like any other more or less modern smartphone, the iPhone can connect to Wi-Fi, 3G, 4G, and in the near future, 5G. It seems to be obvious, and what could be so difficult about setting up the Internet?
However, many Apple users who have been using smartphones from this company for a relatively recent period of time encounter problems with incorrect settings, which is why they cannot use this feature. In this article, we will tell you how to properly set up the Internet on your iPhone in order to use it to the maximum.
Let's start with setting up mobile Internet on the iPhone, as it is the most common and in demand.
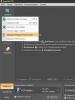
1. First, go to "Settings" → section "General" → tab "Network".
2.In the section " cellular» Scroll down, find the subsection "Cellular data connection" and go into it.
3. Pay attention to the "Cellular data" block. 3 fields must be filled in here: APN, username, password.

For mobile Internet operators, you must enter the following data:
| MTS | beeline | MEGAFON | |
|---|---|---|---|
| APN | internet.mts.ru | internet.beeline.ru | internet |
| Username | mts | beeline | (do not enter anything) |
| Password | mts | beeline | (do not enter anything) |
| TELE 2 | Yota | motive | Rostelecom | |
|---|---|---|---|---|
| APN | internet.tele2.ru | internet.yota | inet.ycc.ru | internet.etk.ru |
| Username | (no login) | (no login) | motivation | (no login) |
| Password | (no password) | (no password) | motivation | (no password) |
Internet and MMS settings for iPhone
Internet and MMS settings on iPhone and iPad
Kyivstar mms, internet settings for iPhone 5
Reset your APN settings if you encounter problems
If all the data is entered correctly, but there is no Internet, the best way out is to reset the APN settings for their subsequent automatic or manual entry. To return to the default APN settings, do the following:
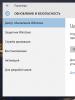
1. Open "Settings".
2. Select the "Cellular connection" section.
4. Select the "Reset settings" function. If you have installed a configuration profile, the profile's default settings will be used instead.
Setting up (enabling and disabling) Wi-Fi on iPhone X, 8, 7, 6, 5
Next on our list is connecting and setting up a Wi-Fi network. Connecting to the network is extremely simple and the only data you will need to enter is the set password (unless the network is open or public).
Here's what you need to connect to Wi-Fi:
1. Tap the "Settings" icon on the home screen, and then tap "Wi-Fi".
2. Make sure the Wi-Fi slider is set to active, then select the network to connect to. If you have previously connected to a specific network, when you are in range of the hotspot, your smartphone will automatically connect to the network.


3. After you select a network, a password prompt will appear .
4. Enter your network password.
5. Click the "Join" button.
6. Free, public Wi-Fi networks usually do not require passwords. However, before connecting to such networks, you should take care of security in order to avoid unpleasant situations with data loss and interception.
If you cannot click "Join", it means that the password you entered is incorrect. Please try typing again or contact your network administrator for further assistance.
After you have successfully joined the network, a check mark will appear next to the network name, and a Wi-Fi signal strength indicator will be displayed on the upper left side of the screen.
Articles and Lifehacks
Many device owners are unpleasantly surprised when the device malfunctions. In this case, it is important to know how to turn on the iPhone after discharge, because hardly anyone wants to be left without communication for an indefinite period.
In addition, a mobile phone is not only a means of communication: someone needs constant access to the Internet, someone is going to read a new book or watch a movie.
Reasons why the device does not turn on
The main reasons why the phone refuses to turn on include:- Problems with the charging connector or the charger itself.
- Failure to comply with the temperature regime for the operation of the device. The owner of the mobile phone was in the heat or cold for a long time, because of which the phone turned off.
- Software failure.
- Mechanical damage.
How to fix the problem
You can use several methods:- Put the mobile phone on charge for one hour, then simultaneously press home + power, holding them for 20 seconds.
- Buy a new charger, put the phone on charge.
- Try to charge your mobile phone through a special cable, thanks to which the iPhone is connected to the computer.
- Take the phone to a service center. Only experts can deal with problems in the device. In the event that the charging connector in the device is broken, it can be replaced at a service center.
- If the phone is working, put it on charge, then press the top button on the iPhone. An image of an apple should appear on the screen. After that, wait a few seconds, and the mobile phone will be ready for use.
- If the iPhone is under warranty, then if it does not turn on after a complete discharge, you must take the device to the store where you purchased it. You may have come across a mobile phone with a factory defect.
- In the event that during charging you see a battery and a red lightning on the screen of the mobile phone, and after disconnecting the charger, an apple appears on the screen and the phone hangs, then you may have problems with the firmware of the device.
In such situations, you need the help of a specialist.
A modern smartphone or tablet is hard to imagine without an Internet connection. Read the news, find something you need in search engine, download a useful application or an interesting game - all this requires Internet access. This tutorial article will tell you how to access the Internet from your iPhone or iPad - and how to exit it.
In contact with
How to turn on mobile (cellular) Internet on iPhone or iPad
You can access the Internet from your iPhone or iPad from any place where your mobile operator provides mobile access to the World Wide Web.
Go to " Settings” and select the section “ cellular". Tap the slider to the right of " Cellular Data” - it will turn green, and the letter “E” or the word GPRS will appear to the right of the name of your operator. We've just gone online! True, so far - only at a low speed, through the second generation of 2G cellular networks. Their resource is enough for the simplest tasks - for example, updating mail or chatting on Skype - but absolutely not enough for surfing the web, navigating maps and downloading applications.

Another very serious drawback is that with 2G enabled, you can only do one thing: either make calls or “surf” the Internet. If you choose the second option, they will not be able to reach you! Therefore, it makes sense to activate the faster 3G or LTE mobile Internet (provided, of course, that your region has coverage of these networks).
You can enable 3G or LTE in the same section " cellular» click on the item « Data options", and then " Voice and data»

In addition, starting with iOS 11, the Control Center also has a toggle that allows you to turn on / off the mobile Internet.

If, after performing the above steps, communication with the World Wide Web via mobile (cellular) traffic has not appeared, then for the Internet to work, you will need enter the correct settings (APN data, username and password) for your mobile operator.
APN data, username and password must be entered along the path: Settings → cellular → Data options → Cellular data network→ section Cellular Data. For example, for the Belarusian MTS, the data is as follows:
API: mts
Username: mts
Password: mts

Usually this data is sent by the operator via SMS automatically. You can also find out by calling the service numbers or at the company's office.
Disabling mobile Internet on an iOS device is also very simple - just touch the slider opposite " Cellular Data"located in settings. Inscription On will change to Off, it means that the smartphone is no longer connected to the network. In Control Center, the Cellular Data button will change from green to transparent.

Internet access via wireless wifi connection - the fastest and most comfortable way to be on the Web using your iPhone or iPad. The speeds are comparable to those you use on a computer. The source of Wi-Fi can be a home modem, a carefree neighbor, a public institution (for example, McDonalds). Starting with iOS 7, there are two ways to enable/disable Wi-Fi on iPhone or iPad:
- Open Control Center (swipe up from the bottom of the display). In the "curtain" that appears, just touch the Wi-Fi icon. Enabled Wi-Fi - blue icon;

ATTENTION! With the release of iOS 11, Apple changed the principle blackouts Bluetooth and Wi-Fi modules through the Control Center. The two buttons are no longer standard on/off switches. and turn off the wireless connection only after a set period of time.


Learn more about managing Bluetooth and Wi-Fi in Control Center.
- Go to " Settings”, select the “Wi-Fi” item (second from the top), touch the only switch, select the required network and password for it. Green color - "on", gray - "off".


That's it, now you are armed with the knowledge of how to turn the Internet on and off on iPhone or iPad. Have a nice trip to the Internet!