How to enable ahci in Windows. Switching from IDE to AHCI without reinstalling Windows. What is AHCI and IDE
Advanced Host Controller Interface (AHCI) technology is a standard proposed by Intel that allows you to increase the read / write speed for hard drives connected to a computer via the SATA interface. If your computer has a modern HDD(ssd for example or regular hdd sata), and the motherboard supports AHCI mode - you may have thought about how you can increase the performance of your PC.
OS Windows Vista/7/8/8.1 already have built-in support for the AHCI standard, so if during Windows installation detects that the computer supports AHCI, the AHCI driver will be installed automatically. Windows XP does not have built-in support for this standard, but it is possible to make friends with them, look for material on this topic separately. Older motherboards that support AHCI at the chipset level have AHCI disabled at the BIOS level. But what about in a situation where the operating room Windows system 7 already installed? I think many who have encountered this problem know that by changing the IDE mode to AHCI in the BIOS, windows simply will not start. And you will most likely get a BSOD (blue screen of death). The option that suggests itself is to change the BIOS mode from IDE to AHCI, then reinstall Windows. BUT! In this case, you lose all data on the C drive, which can be painful if there are many applications installed there and valuable information is stored. The following is a way to switch to AHCI mode without reinstalling the system and losing data on Windows 7. For users. Remember, you perform all actions at your own peril and risk, and no one except you is responsible for them.
Attention! The following sequence of actions must be performed BEFORE enabling AHCI mode in the BIOS settings. Otherwise, the system will stop booting!
1. Press the key combination Win + R, and in the window that opens, type the command regedit to open the Registry Editor. To whom it is difficult, you can type regedit directly in the Start menu bar.

2. When prompted "Do you want to allow the following program to make changes to this computer?" we answer "Yes".
3. In the registry editor, navigate to the required branch: HKEY_LOCAL_MACHINE\SYSTEM\CurrentControlSet\services\msahci
4. In the right pane, find the option Start and edit it ( Change)

5. Set the parameter “ Start" meaning 0 , and press OK. Default value (AHCI support disabled) : 3 .

6. Close the registry editor.
7. Restart your computer.
8. While restarting the computer, enter the Bios menu and enable AHCI support. Press the F10 key, save changes and restart your computer again.
9. After downloading, Windows 7 will automatically install the AHCI device drivers. After finishing their installation, Windows will reboot one more time. 10. That's all! After loading Windows, hard drives will support the AHCI standard, and therefore work faster. The visual performance increase is very subjective! Yes, your computer will become faster, but other than hard drive there are still a lot of things in the computer that can slow it down, so you may not see a clear increase in speed.
That's all. Thanks for reading the article. I hope it was helpful to you.
Good day.
Quite often I am asked about how to change the AHCI setting to IDE in laptop BIOS(computer). Most often they encounter this when they want:
Check the computer hard drive with Victoria (or similar). By the way, such questions were in one of my articles:;
Install the "old" Windows XP on a relatively new laptop (if the parameter is not switched, then the laptop simply will not see your installation distribution).
So, in this article I want to analyze this issue in more detail ...
Difference between AHCI and IDE, mode selection
IDE is an obsolete 40-pin connector that used to be used to connect hard drives, disk drives, and other devices. Today, this connector is not used in modern computers and laptops. This means that its popularity is falling and it is necessary to use this mode only in rare certain cases (for example, if you decide to install the old Windows XP OS).
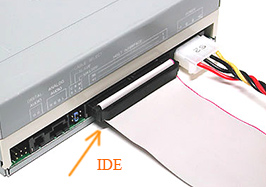
The IDE connector has been replaced by SATA, which is superior to IDE due to its increased speed. AHCI is a mode of operation for SATA devices (such as disks) that ensures their normal operation.
What to choose?
It is better to choose AHCI (if you have such an option. On modern PCs, it is everywhere ...). You need to choose an IDE only in specific cases, for example, if drivers for SATA are not “added” to your Windows OS.
And by choosing the IDE mode, you seem to “force” a modern computer to emulate its work, and this definitely does not lead to an increase in performance. Especially when it comes to modern SSD drive when using which, you will get a gain in speed only on AHCI and only on SATA II / III. In other cases, you can not bother with its installation ...

You can read about how to find out what mode your disk is in in this article:
How to switch AHCI to IDE (on the example of a TOSHIBA laptop)
For example, I'll take a more or less modern TOSHIBA L745 laptop ( by the way, in many other laptops, the BIOS setting will be similar!).
To enable IDE mode in it, you need to do the following:
1) Enter the laptop BIOS (how this is done is described in my previous article:).
3) Then, in the Advanced tab, go to the System Configuration menu (screenshot below).
4) In the Sata Controller Mode tab, change the AHCI parameter to Compatibility (screen below). By the way, you may have to switch UEFI Boot to CSM Boot mode in the same section (in order for the Sata Controller Mode tab to appear).
Actually, it is the Compatibility mode that is similar to the IDE mode on Toshiba laptops (and some other brands). You don't have to look for the IDE strings - you won't find it!
Important! On some laptops (for example, HP, Sony, etc.), the IDE mode cannot be turned on at all, as manufacturers have greatly reduced the functionality Device BIOS. In this case, you will not be able to install the old Windows on the laptop ( however, I do not quite understand why this should be done - after all, the manufacturer does not release drivers for old operating systems anyway ...).
If you take a laptop "older" (for example, some Acer) - then, as a rule, switching is even easier: just go to the Main tab and you will see Sata Mode in which there will be two modes: IDE and AHCI (just select the one you need, save the BIOS settings and restart the computer).
This concludes the article, I hope that you can easily switch one parameter to another. Successful work!
Today we will learn a simple thing - how to change SATA mode from IDE to AHCI in the BIOS with Windows 7 already running. After all, those who have already tried to change this mode were able to see the blue screen of death the first time they tried to boot Windows. And the solution will be to make changes to the Windows registry, which we will do now.
Very short note: In the era of Windows XP and earlier, the IDE or PATA interface was widely used, which is left in modern motherboards only for compatibility with older devices and systems. Today, the standard is SATA, different revisions of which differ in bandwidth.
Yesterday I was at one of my clients and on one of the computers I happened to put this method into practice. I just stood there and was sad on the ide mode of Windows 7. I decided to transfer it to AHCI without reinstalling, at the same time improve performance.
So let's get started.
Press Win + R and write regedit, click OK, the Registry Editor opens.
If you have, for example, RAID mode, then you may need this address in the registry:
HKEY_LOCAL_MACHINE\System\CurrentControlSet\Services\IastorV
Before you should open approximately the same view as in the screenshot. We need the Start parameter, for me it has a value of 3. We double-click on the parameter name.

When you double-click on the name, an editing window will open. Here you need to change the number to 0 (zero).

To look like this. Click OK, save.

After our manipulations, the final value looks like this:

There are finishing touches left. Now you need to restart Windows and go into BIOS, change the mode there to the desired one.
When the computer starts to restart, do not miss the moment to enter the BIOS. Usually this is the Del key. Notebooks may have F2, F10, or F12 keys.
On motherboard my client item looks like Storage configuration, inside the sub-item SATA configuration (compatible or enhanced).

Select the Configure SATA as sub-item, which is in the value and press Enter. Choosing the AHCI value

The final item now looks like Configure SATA as . We press F10 to save the BIOS settings, then Enter and the computer reboots again.

And now comes the moment of truth!
Windows 7 should boot normally and upon boot it will detect new devices, for which it will vigorously search and install firewood. Perhaps after that she will ask you to reboot. Reboot, make Windows nice.
This method worked in my case and even visually the computer began to run faster.
AHCI mode is supported in Windows operating systems starting with Windows Vista. In older versions of the OS (such as Windows XP, etc.), there is no built-in support for AHCI mode, and for this mode to work, you need to install additional vendor-specific drivers.
However, not everything went smoothly with the activation of the AHCI mode in the new Microsoft OS. In the event that the system was installed in normal (IDE) mode, the AHCI driver in the system is in disconnected condition. This leads to the fact that on such systems, when you enable the AHCI mode on the SATA controller in the BIOS, the system stops seeing the sata disk (there is no necessary ahci driver) and crashes into a BSOD ( INACCESSIBLE_BOOT_DEVICE). For this reason, controller chipset manufacturers (primarily Intel) recommend enabling AHCI mode BEFORE OS installation, in this case the installer understands that the chipset supports AHCI mode and installs the necessary drivers (for some chipsets, sometimes you have to load specific AHCI / RAID drivers directly during the Windows installation process, for example, from a USB flash drive or cd / dvd drive).
Note. Mode AHCI (Advance Host Controller Interface) allows you to use advanced SATA features such as hot plugging ( hot plugging) And NCQ(native command queuing), which allows you to improve the performance of disk operations.
In Windows 8, the situation with AHCI activation has not changed, and if you try to change the SATA controller mode to AHCI without making changes to Windows itself, this will make it impossible to boot from the system disk. The fact is that Windows 8 also does not automatically load an AHCI driver for a controller that was not in AHCI mode at the time of system installation.
The article is intended for those who installed Windows 8 in IDE mode and would like to switch to AHCI mode without reinstalling operating system. In the event that AHCI mode is already set in the BIOS (or), then there is no need to do anything extra - your Windows 8 already supports AHCI mode.
We have already described without reinstallation. According to this article, on a Windows 7 operating in normal (ide) mode, it is necessary to switch to the automatic download standard AHCI driver (the driver is called msahci) and only then enable AHCI in the BIOS. The procedure was fairly smooth and in most cases painless.
In Windows 8 (and Windows Server 2012), when trying to enable AHCI mode in this way, the user will encounter a problem: the HKEY_LOCAL_MACHINE\SYSTEM\CurrentControlSet\services\msahci branch is simply missing in the registry. And attempts to create it manually will lead nowhere.
The fact is that Microsoft decided to change the name of the driver responsible for supporting the AHCI mode for SATA controllers, replacing it with a new driver called StorAHCI. It should be noted that this driver has the same functionality and supports the same devices as MSAHCI.
We were able to find two ways to activate AHCI after installing Windows 8. One of which is associated with modifying the registry, the second is with booting into safe mode.
Enable AHCI in Windows 8 using the registry
To enable AHCI mode in Windows 8 without reinstalling the system (which was installed in IDE mode), you need to make changes to the system registry.
Note: once again we recall the indicated modification of the registry Windows 8 must be made BEFORE enable AHCI in the BIOS.

Unfortunately, this method of activating the ahci driver in Windows 8 does not always work (it does not work in about 10-20% of cases). In this case, it is recommended to use the official instructions from Microsoft, available in the knowledge base article KB2751461(http://support.microsoft.com/kb/2751461).
Alternative way to enable AHCI in Windows 8
In the event that the above method did not work, and Windows 8 does not boot in AHCI mode, leaving in BSOD or endless attempts to restore Windows (Attempting repair). Necessary
- Disable AHCI mode in BIOS
- Revert changes to the system registry by setting ErrorControl = 3 And StartOverride\0 = 3
- With the help of the following command, set Windows boot 8 in safe mode - Safe Mode (as an option, you can). bcdedit /set (current) safeboot minimal
- Then the system needs to be rebooted, re-enter the BIOS, switch to AHCI Mode and save the changes.
- As a result, Windows 8 should boot into safe mode and automatically install the AHCI driver.
- Then you need to disable booting in SafeMode: bcdedit /deletevalue (current) safeboot
- And restart Windows
- The next time you boot the system, the system should boot normally. It remains to make sure that the AHCI controller appears in the device manager.
To verify that the performance of the Windows 8 disk subsystem has increased due to the AHCI mode, run the update and check that the Disk data transfer rate value (the speed of information exchange with the disk) has increased. In our example from 5.2 to 8.1
units (although to be honest, there are more 🙂). 
Where it was mentioned that AHCI mode is needed for its normal operation. This mode opens the possibilities of storage devices to the full, which greatly improves performance. We are talking about memory drives - SSD, HDD. Next, you will find out what AHCI is, check if it is enabled, and if not, enable it.
What is AHCI?
Previously, computers had the so-called PATA interface, to which all storage devices were connected, but the times have passed and the SATA interface has come to replace it, which will be discussed now.
SATA has two modes of operation:
IDE(Integrated Development Environment) - this mode is needed to create compatibility with legacy devices that are still connected via the PATA interface, which can be said that the SATA interface with IDE mode almost the same as PATA.
AHCI(Advanced Host Controller Interface) is a SATA mode that reveals all the possibilities of memory drives. It has some interesting features: hot-plugging and connecting hard drives, that is, you can do this while the computer is turned on. Another possibility is NCQ technology, which reduces the number of read head movements for hard drives, and also improves drive performance.
Using this mode will have a positive effect on, in practice it is not so noticeable, to be honest, but still, there is something, so I would recommend turning this mode on if it is turned off, especially since there is nothing complicated about it.
Does your computer have AHCI mode?
There are two ways to find out if there is an AHCI mode on a PC or laptop, if you have it fairly new, then most likely you have it.
First method : We must go to the device manager, where you expand the tab IDE ATA/ATAPI controllers, or something similar, and if the word AHCI is present in the controller name, then this mode is used.

Second method : The presence and use of AHCI mode can be viewed and . There you should find SATA mode, or something similar and check if it's AHCI, then you can be calm.
I want to remind you that instead of the AHCI item, there can be IDE, but you should not immediately switch this mode, below you will find out why.
How to enable AHCI mode in the operating system?
Enabling AHCI goes through the BIOS. Most likely, you have SATA interfaces on your motherboard, but you cannot activate the AHCI function in the BIOS. Most likely the matter is in the BIOS firmware, and it needs to be updated, but without special knowledge this should not be done.
If you have modern Windows versions, then you already have the AHCI driver installed, it is required. It has been built in since Windows Vista. In this case, you can activate AHCI without any problems.
What to say about Windows XP, at that time there was no AHCI mode, and the SATA interface was just being developed. But the necessary driver can be found on the Internet and used in Windows XP.
That's all, I told you about the features of the AHCI mode, now you know how to check for its presence, and how to enable it.